Friday is the deadline. You have a voiceover line you like, a screen recording, and a vague plan for a logo at the end. What you don't have is a document that tells an editor what appears at second twelve, or tells a caption tool what to print.
That gap is what a usable av script example closes. Not another theory post about two-column layouts, but one finished script you can read top to bottom and see the whole plan: timecode, visual, audio, caption.
Everything below builds from a single 30-second demo, then widens out to the format vocabulary, the writing order, the caption checks and the accessibility fields that keep the same script usable when someone watches with the sound off. Copy the tables as you go.
A Complete AV Script Example, Annotated
Four beats. Thirty seconds. One product demo. Each row is both a production unit and an accessibility unit: the visual tells the editor what to cut, the audio tells the mix what to hear, and the text line still carries the claim when the sound is off.
Sample AV script for a 30-second product demo
| Timecode | Visual | Audio | Caption or on-screen text |
|---|---|---|---|
| 0:00-0:05 | Wide shot of a cluttered desk with an open laptop | VO: Making a product video used to take a full day. | Caption matches VO |
| 0:05-0:12 | Close-up of a cursor pasting a script into the editor | VO: Paste your script, and the scenes build themselves. | On-screen: Step 1, paste script |
| 0:12-0:22 | Screen capture of a timeline filling with generated scenes | SFX: soft click; music fades in low | On-screen: Step 2, review scenes |
| 0:22-0:30 | The finished cut playing on the laptop, end card sliding in | VO: Review, adjust, publish. Music lifts under the last line. | On-screen: Step 3, publish |
Read any row left to right and you have the whole beat: when it happens, what the camera shows, what the ear hears, what the eye reads. The visual column is an instruction to the editor. The audio column is the viewer's experience. When those two disagree at the same timecode, the cut looks unfinished no matter how clean the footage is.
Use 0:05-0:12 as the worked beat, because one set of cells has to serve three playback modes. The visual is a close-up of a cursor pasting a script into the editor. The voiceover is "Paste your script, and the scenes build themselves." Captions print that spoken line inside the same seven-second window. Audio description takes its wording from the visual cell and sits beside the voiceover, not on top of it, so the action is heard without covering the line. Silent autoplay ignores both audio cells and uses the on-screen text already written: "Step 1, paste script." Same row. Three outputs.
Three checks this draft already passes, and the same three catch most weak drafts:
- One visual objective per beat. The cursor pastes, the timeline fills, the cut plays. No row asks a viewer to notice two actions at once.
- The spoken line finishes inside its window. The first two voiceover lines run roughly 8 to 10 words over five to seven seconds, which is comfortable at normal narration pace. Nothing gets clipped mid-word by the next cut. The closer is shorter on purpose: "Review, adjust, publish" is three words across the last eight seconds, with music lifting under it.
- The key step is readable without sound. On-screen text states Step 1, Step 2 and Step 3. Where the caption matches the voiceover, as in the opening line, the spoken claim and the printed claim stay the same sentence.
A row you can't film is a sentence, not a beat.
Copy the table into your doc and replace the product details with yours. You then have timings an editor can hit and text a caption file, an audio-description pass and a muted autoplay can all use.
What an AV Script Is and Who Uses It
A trainer is drafting a five-minute onboarding module. Four people share that page: the writer, the editor or director, the voice artist or generation tool, and the reviewer signing off on captions. An AV script is the timed document that pairs what viewers see with what they hear.
A screenplay organizes dialogue and action for a reader imagining the finished film. An AV script for a 30-second ad, a training module, or a social clip is built around narration, timing, and visual proof of a claim. The piece is mostly voiceover plus screen capture or b-roll. Marketers, trainers, and creators prompting clips all write in this split.
I treat each beat as both a production unit and an accessibility unit. At 0:12 the picture is a new hire clicking "Start course." The line is "Click Start course. Your first lesson opens," and the caption is that same sentence. An audio-description note reads "A cursor selects a button labeled Start course." Muted autoplay still works if the button label carries the instruction.
Layout can flex. Even rough timecodes, a visual column, and an audio column stay. A script without duration is a blog post. Visuals say what the camera or screen shows. Audio holds voiceover, dialogue, music, and effects.
Hand the page to a stranger who missed the planning meeting. If they can cut the video, captions included, without asking you a question, the script works. Video is a standard marketing tool, so that page is probably already in progress this month.
Script Format Elements and Scene Headings
A production team reads your script the way a builder reads a plan, so use the vocabulary they expect.
Script elements, their purpose and an example
| Element | Purpose | Example |
|---|---|---|
| Scene heading | Sets place and time | INT. KITCHEN – DAY |
| Action | Describes what viewers see | Maya lifts the jar toward the window. |
| Character cue | Names who speaks | MAYA |
| Parenthetical | Adds a delivery note | (smiling) |
| Dialogue or narration | Gives the spoken words to caption | Your starter is ready when it doubles. |
| Transition | Marks how one scene joins the next | CUT TO: |
The scene heading carries the most weight, because it answers three questions at once: indoors or outdoors, which location, day or night. INT. KITCHEN – DAY tells a crew the setting, the lighting setup and the schedule slot in six words. The BBC's screenplay guidance puts sluglines in capitals, requires action to follow immediately after the heading, and asks for action text in upper and lower case with spacing that visually separates one scene block from the next.
Action is written in present tense and kept short enough to scan: only what a camera or screen can capture, no interior thoughts. A character cue sits in capitals above the line so both a voice artist and a caption tool know who is speaking before they read the words.
A parenthetical is a delivery note, not a stage direction. Use it only when tone changes meaning, as in (smiling) versus (flat). If the line reads the same either way, cut the parenthetical.
When time passes inside one location, the BBC guidance recommends LATER as a subheading rather than a fresh scene heading. The location, props and lighting stay put, and the schedule stays honest.
Practical rule: if a scene heading needs a comma to explain itself, you're looking at two scenes.
Keep capitals and spacing consistent across the whole document. Editors and video generation workflows both use those boundaries to find where a scene starts and ends, and an inconsistent heading is the first thing that gets misread.
How to Write an AV Script Step by Step
The order you write in matters more than the template you write on. Draft the narration first and you'll invent visuals to decorate words. Draft the beats first and the visuals and the words arrive together.
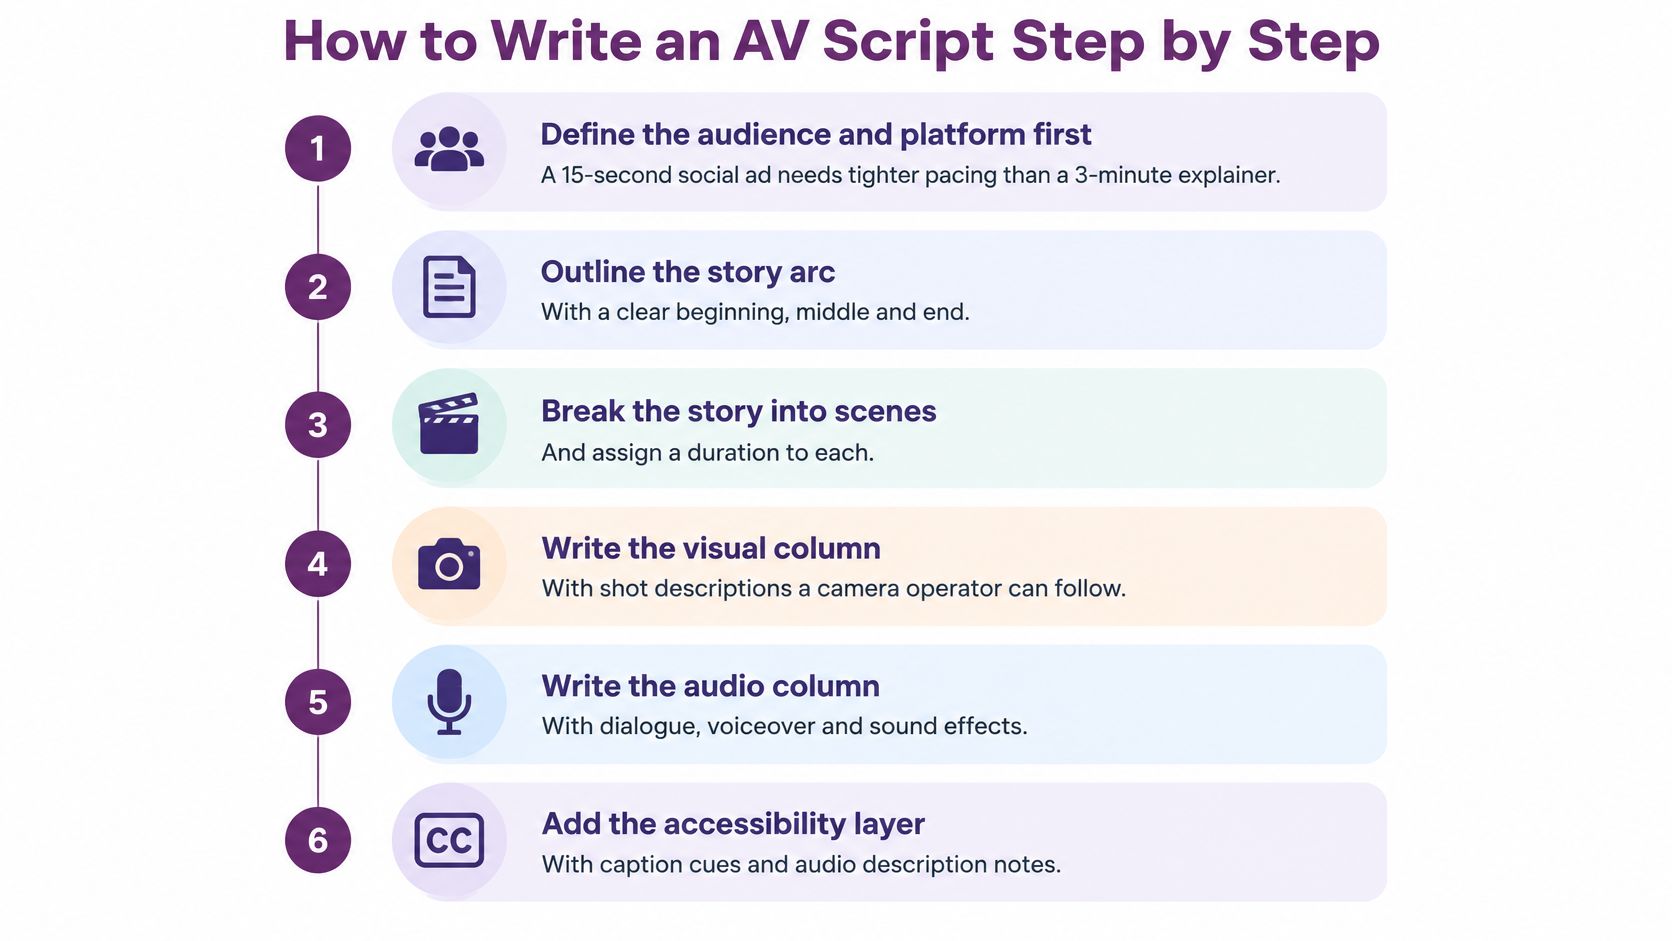
The W3C's media accessibility planning guidance frames this as a two-track production document: one side for narration, dialogue, music and effects, the other for shots, on-screen text, actions, transitions and accessibility descriptions. Build both tracks at the same time and the script stays honest.
The six steps
- Define the audience and platform first. A 15-second social ad, a three-minute training module and a 90-second explainer need different pacing, different caption density and different openings. Platform also decides your frame, which decides what a shot can hold.
- Break the concept into scenes, one claim per scene. A scene that argues two points can't be tested on its own, and when it fails you won't know which point failed. One claim also gives you a natural cut point.
- Write a visual objective and a spoken objective for each scene before drafting a line. The visual objective is what the viewer must see to believe the claim. The spoken objective is what they must hear. If the two are the same sentence, you probably have an audio-only video with wallpaper over it.
- Write narration to the runtime. About 130 to 150 spoken words per minute is a working pace for calm, clear delivery. A 30-second beat holds roughly 65 to 75 words, which is less than most first drafts. Cut lines rather than speeding up the read.
- Add shot direction and on-screen text. Subject, action, setting, camera framing, duration and transition, spelled out per row. If the visual can't carry the claim without the narration, add on-screen text or a short demonstration instead of a longer voiceover.
- Validate timing, captions and continuity. Read the full script aloud against a timer, then check that each scene opens on a clear image. A scene that starts mid-motion forces the editor to invent a transition you didn't plan.
Where these scripts break
The failure that costs the most is step 5 done badly: a strong voiceover with no visual direction. The draft reads well in a meeting, then production guesses at the footage, the edit has nothing to cut against, and the reshoot costs more than the script ever saved.
Two other patterns show up constantly. Scenes run long because nobody timed them aloud, so the voice artist races the last four words. And the call to action arrives as an afterthought inside the final second, which means nobody reads it.
If you want to see where scripting sits relative to research, shooting and publishing, Gainsty's content production process for creators maps the stages around it, which helps you set realistic review dates instead of discovering the script is late the day before the shoot.
Once the format settles, teams usually want to generate from it at volume. Wiring the same scene fields into a render pipeline through a developer API beats retyping them into a tool by hand.
Caption and Timing Checks Before You Render
Caption errors are cheap to fix in the script and expensive to fix after rendering, because every correction means a new export and a new review. Check against numbers, not impressions.
Caption and timing targets to check before rendering
| Check | Target | Why it matters |
|---|---|---|
| Caption accuracy | 99% | Captions match the spoken words and pass the FCC accuracy formula |
| Sync with speech | Within 1 second | Viewers can follow the words as they are spoken |
| Lines per caption | 2 to 3 maximum | Keeps each caption frame readable |
| Characters per line | About 32 to 42 | Prevents awkward breaks inside a phrase |
| Minimum display time | 1 second per frame | Gives viewers time to read the caption |
Those figures come from the Section 508 captioning and transcripts guidance, which publishes the University of Arizona's operational targets. Treat them as the pass mark rather than the ambition.
The pass that catches most errors
Build a rough transcript from the voice track first. Align it to the scene timecodes, then correct proper names and technical terms by hand, because auto-transcription reliably mangles product names. Label every speaker, insert sound cues in brackets such as [music] or [applause], and review the render twice: once at normal speed for flow, once slowed down for timing.
The accuracy math is worth knowing because it settles arguments with reviewers. Under FCC caption quality rules, captions must match the spoken words in the original language, preserve the order they're spoken in, and not replace proper names or places. Captions start when the speech or sound starts and end approximately when it ends. The FCC's own worked example: 7,000 total words minus 70 errors leaves 6,930 correct words, and 6,930 divided by 7,000 equals 99% accuracy.
Captions also count as acceptance criteria, not polish. WCAG 2.1 Success Criterion 1.2.2 requires captions for prerecorded video, as that Section 508 guidance notes.
Four pitfalls survive most reviews:
- Paraphrased captions: a tight rewrite of the line is not a caption. Transcribe what was said.
- Line breaks mid-phrase: breaking after "paste your" instead of "paste your script" costs the viewer a re-read.
- Unlabeled speaker changes: in a two-person scene, the viewer shouldn't have to guess who's talking.
- Competing text: an on-screen graphic sitting where the subtitle lands, so both become unreadable.
For AI-generated multi-character videos, lock the speaker label, the voice, the pronunciation list and the caption style before the first render. Revising any of them later can shift identity and timing across scenes you'd already approved.
Building the Accessibility Layer Into Every Beat
Most AV script examples stop at two columns, which leaves the hardest questions unanswered: who is speaking, what sound matters, and what a viewer loses with the volume off. The Agency for Healthcare Research and Quality guidance is blunt about the requirement: visual elements should be identified separately from audio sources, and all video products must be captioned. The W3C goes further and expects captions to convey relevant non-speech audio, not just dialogue.
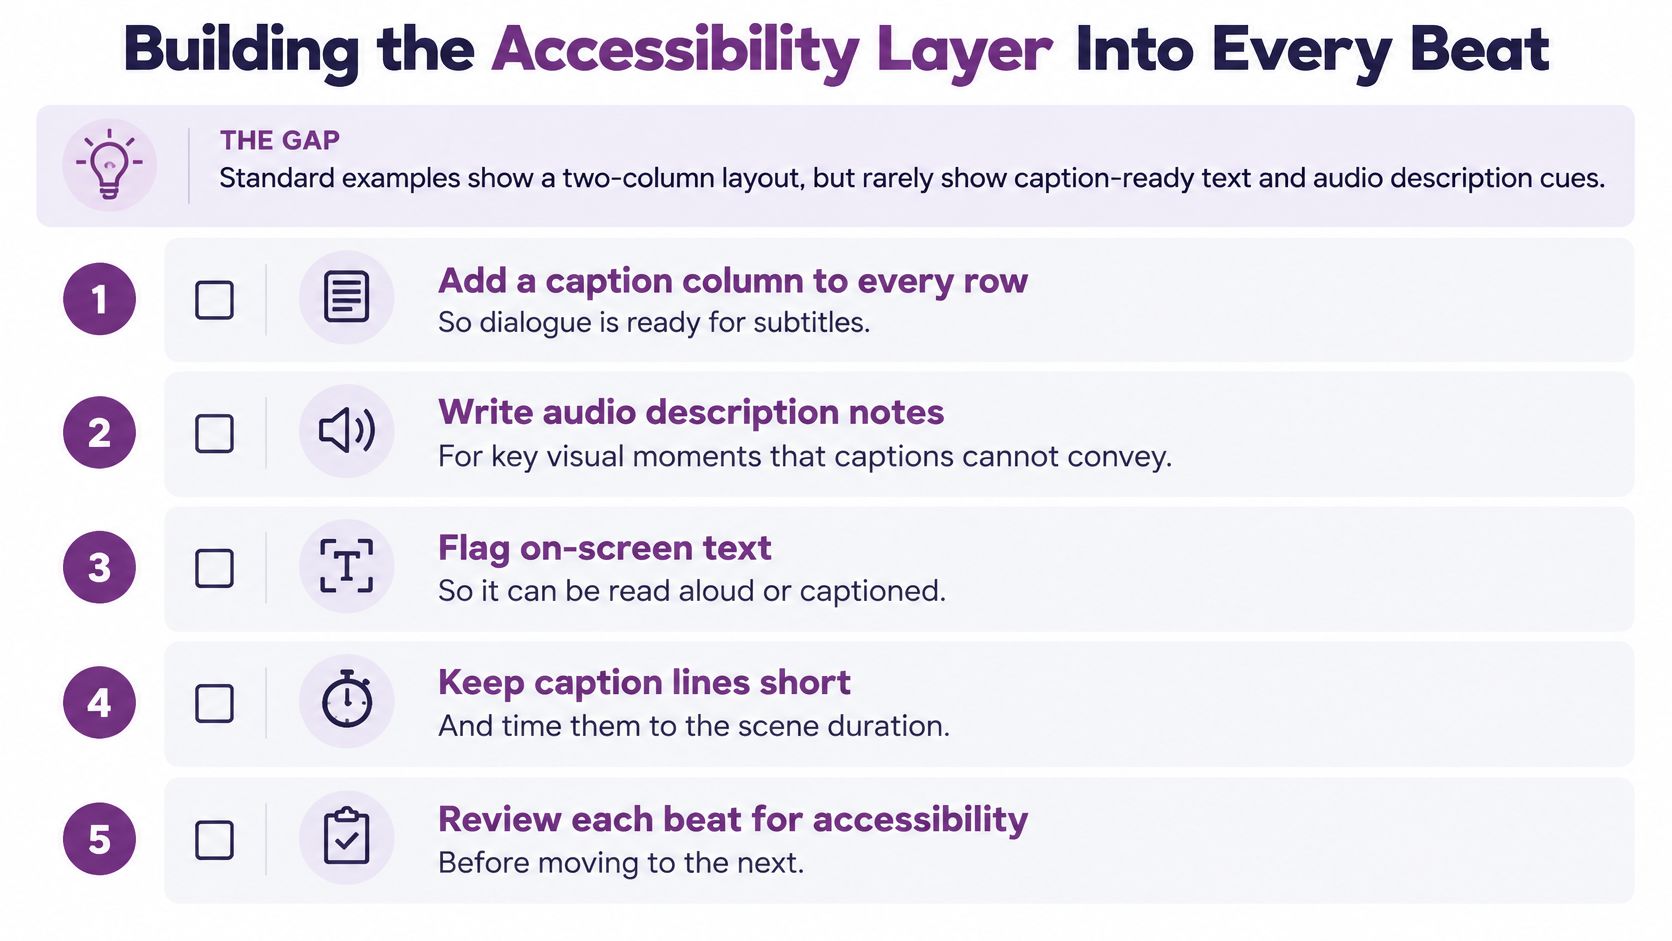
The fix is a third layer on every row, six fields attached to the same beat:
- Spoken words: the exact line, caption-ready.
- On-screen text: every label, lower third and end card.
- Non-speech audio: clicks, music cues, alarms, anything that carries meaning.
- Visual description: what a viewer who can't see the frame would need to know.
- Speaker identity: a name, or "none" when nobody speaks.
- Caption-safe timing: display time long enough to read the line.
One beat, six fields
Take Beat 3 from the demo. Spoken words: none, it's a screen capture. On-screen text: Step 2, review scenes. Non-speech audio: a soft click as each clip lands, music low underneath. Visual description: five clips align left to right as the timeline fills. Speaker identity: none. Caption-safe timing: the click caption starts on the click and holds for a second after the last clip settles.
That single layer is what makes the script survive silent autoplay, which is how a large share of product demos, training clips and social video are first seen. Audio description earns its place when the visual carries information that no line of speech covers. It has to fit inside a pause or replace a sentence, so write it into the beat rather than noting "add description later".
Write the description into the pause, not over the sentence.
These six fields don't replace the production fields in the same row. Subject, action, setting, camera framing, duration, emotion and transition all stay, because the camera operator and the captioner are reading the same document for different reasons.
Templates for Five Common Video Types
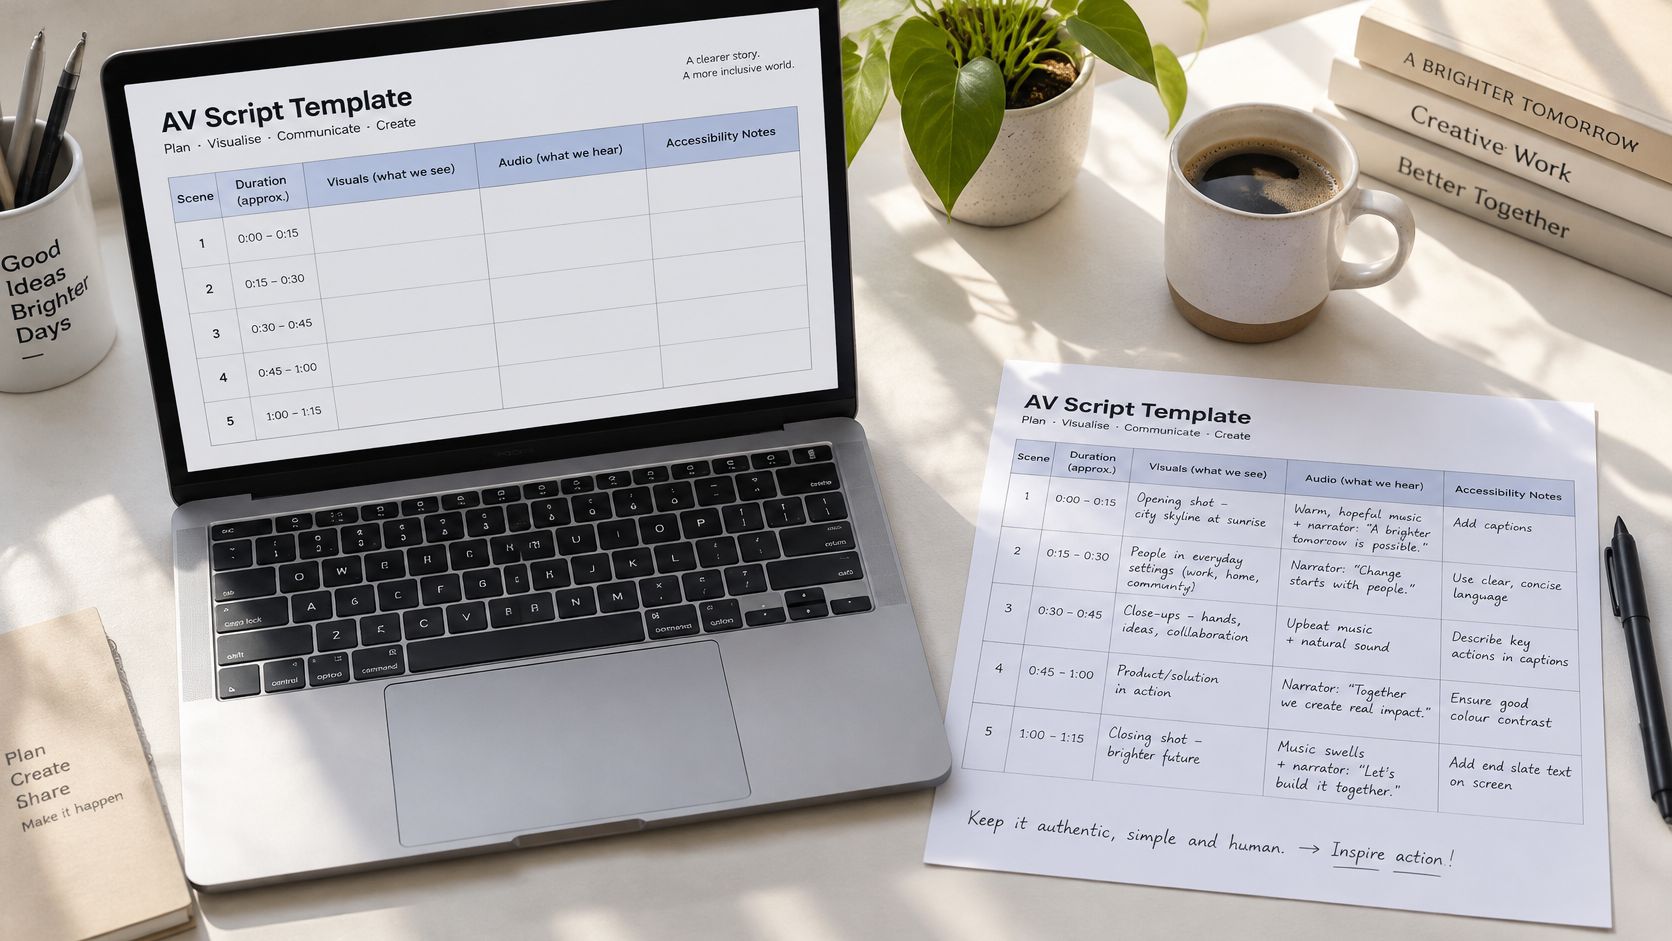
Starting from a structure beats starting from a blank page, and the differences between video types are mostly in the scene pattern, not the columns.
The appetite is there. In 2024, 89% of consumers said they wanted to see more videos from brands, according to HubSpot's State of Video Marketing research, which is a lot of scripts to write badly.
AV script templates by video type
| Video type | Typical runtime | Scene pattern | Must-have fields |
|---|---|---|---|
| Product demo | 60 to 90 seconds | Problem, feature walkthrough, result | Screen actions, on-screen labels, end card |
| Training or onboarding | 3 to 8 minutes | Objective, numbered steps, check for understanding | Step numbers, pause points, captions, glossary terms |
| Social ad | 15 to 30 seconds | Hook, benefit, call to action | Hook text in the first 3 seconds, captions, aspect ratio |
| Explainer | 60 to 120 seconds | Question, answer in three beats, summary | Narration timing, diagram cues, audio description |
| Internal update | 2 to 5 minutes | Headline, context, action items | Speaker labels, lower thirds, transcript |
Pick the row closest to what you're making, copy its scene pattern, then size the scenes against runtime. What changes by type:
- Product demo: the feature has to work on screen, not just in the voiceover. Labels on the interface carry as much meaning as the narration, so treat them as script elements.
- Training or onboarding: numbered steps and deliberate pause points where the learner is meant to try something. Any term you'd have to explain twice deserves a glossary row.
- Social ad: the hook lands in the first three seconds and captions are on by default. Lock the aspect ratio before anyone writes a shot.
- Explainer: one question, answered in three beats, then a summary. Diagram cues and audio description belong in the draft because the visuals carry the argument.
- Internal update: speaker labels and a transcript, because part of the audience will read it at a desk instead of watching it.
One claim per scene, and aim for four to six scenes in a 30-second clip. Below four, the video feels static. Above six, every scene is a flash frame.
Templates are starting structures, not rules. The accessibility columns stay in place even when a template changes, because captions and audio description depend on them. The same four columns work for a birthday video as for a product demo; only the tone and the shot list shift.
If your social output leans on other people's footage, the discipline is the same: structure your meme clipping brief at FindClout before anyone opens an editor, so source, crop and caption are settled in writing.
Turn Your Script Into a Video This Week
A product demo due Friday teaches the format faster than another read-through. Open the scene table for that job, write the platform and the runtime in the header, and stop there until both are fixed. Those two lines decide how many beats you can afford.
- Pick one video you owe someone. Note the platform and the runtime before you write a word, because both set the scene count.
- Fill in the scene table from the annotated example. Match the number of rows to the runtime in the header, one claim per row.
- Run every row against the caption targets. Speaker changes, characters per line, display time.
- Add the accessibility fields to each beat. Spoken words, on-screen text, non-speech audio, visual description, speaker identity, caption-safe timing.
- Turn the scenes into a storyboard, then review the first render against the script rather than against your memory of what you intended.
That last check is where the written script earns its keep. Text-to-video generation builds scenes directly from the words in each row, and storyboard creation sets the flow before production starts, so the table you filled in is the plan the video is built on. Compare the first render to the page. A line that drifted, a caption that overruns its display time, or a sound cue with no visual match shows up there, not in a memory of what you meant to say.
Runtime is the lever with the clearest payoff. In 2024, 88% of marketers reported that video marketing generated a positive return on investment, according to research summarized by NetInfluencer. A script that respects its own timing is usually where that return starts. Miss the first three seconds on a short cut and the rest of a careful script never gets seen.
The same document discipline travels to other formats. Teams sharing personal vehicle videos with shoppers plan each walkaround as a sequence of timed beats, because the viewer decides within seconds whether to keep watching, and a script is how you control those seconds.
What to carry into every script from here:
- Two tracks, always: visual and audio agreeing at the same timecode.
- Scene headings with clear time markers: place, interior or exterior, day or night, with LATER when time moves inside one location.
- A caption and timing check before rendering: accuracy, sync, line length, display time.
- An accessibility layer on every beat: so the video works muted, captioned and described.
Save the template. The second script takes half as long as the first, and the tenth takes twenty minutes.
LunaBloom AI takes the script you just built and turns it into a finished video, generating scenes directly from your words and shaping the flow in a storyboard before production begins. Voiceovers and automatic captions are generated alongside the visuals, so the spoken lines in your script can be turned into a finished video in one place. Bring one real script this week and see what it becomes at LunaBloom AI.