Ever stared at a PowerPoint deck and thought, “This could be so much more than static slides”? You’re in the right place. The fastest way to create a video from PPT is either using PowerPoint’s built-in ‘Export to Video’ feature or leveraging a dedicated AI tool to handle the heavy lifting.
The built-in option is perfect for quick, no-frills conversions. But if you’re aiming for a polished, professional video with AI avatars, realistic voiceovers, and dynamic scenes, an AI tool is your best bet.
Turn Your Slides Into Dynamic Videos
Transforming a presentation into an engaging video is no longer a complex, week-long project. It’s a smart strategy to capture your audience’s attention with a format they genuinely prefer. Imagine your next sales pitch, training module, or marketing update as a memorable video instead of a slide deck people click through.
This shift is possible thanks to modern technology. By 2025, turning a PowerPoint into a video has become standard practice, largely due to the power of AI tools. Platforms like AI Studios by DeepBrain AI can take your slides and generate a fully narrated video featuring AI presenters, complete with lifelike lip-syncing and voiceovers in dozens of languages. It’s a total game-changer for content creation.
Choosing the Right Method for Your Project
So, which path should you take: a simple export from PowerPoint or a dedicated AI tool? Your choice depends entirely on your project’s goals.
- PowerPoint’s Built-in Export: This is your go-to for speed and simplicity. If you just need a direct video file of your slides, this feature works perfectly. It’s ideal for archiving presentations or when you’ve already recorded your own narration.
- AI Video Generation Tools: Opt for this when you need a professional, high-impact video. Tools like LunaBloom AI can add dynamic elements such as AI narrators, background music, and automated subtitles, turning a simple slideshow into a compelling story.
Here’s a quick comparison to help you decide between PowerPoint’s native feature and a dedicated AI video creation tool.
Choosing Your PPT to Video Conversion Method
| Feature | PowerPoint’s Built-in Export | AI Video Generation Tools |
|---|---|---|
| Speed | Very fast for simple conversions. | Fast, but processing AI elements takes a few minutes. |
| Ease of Use | Extremely easy; just a few clicks. | Simple drag-and-drop interfaces; minimal learning curve. |
| Voiceover | Manual recording required. | Automatic, professional AI-generated voiceovers. |
| Visuals | Static slides with basic transitions. | Dynamic scenes, stock footage, AI avatars, and animations. |
| Cost | Free (included with PowerPoint). | Typically subscription-based, with free tiers available. |
| Best For | Quick archiving, internal sharing, simple recordings. | Marketing videos, training modules, social media content. |
Ultimately, your decision hinges on whether you need a quick-and-dirty conversion or a truly engaging video that can stand on its own and drive results.
This infographic breaks down how a static slide gets transformed into a dynamic video, highlighting each step of the conversion.
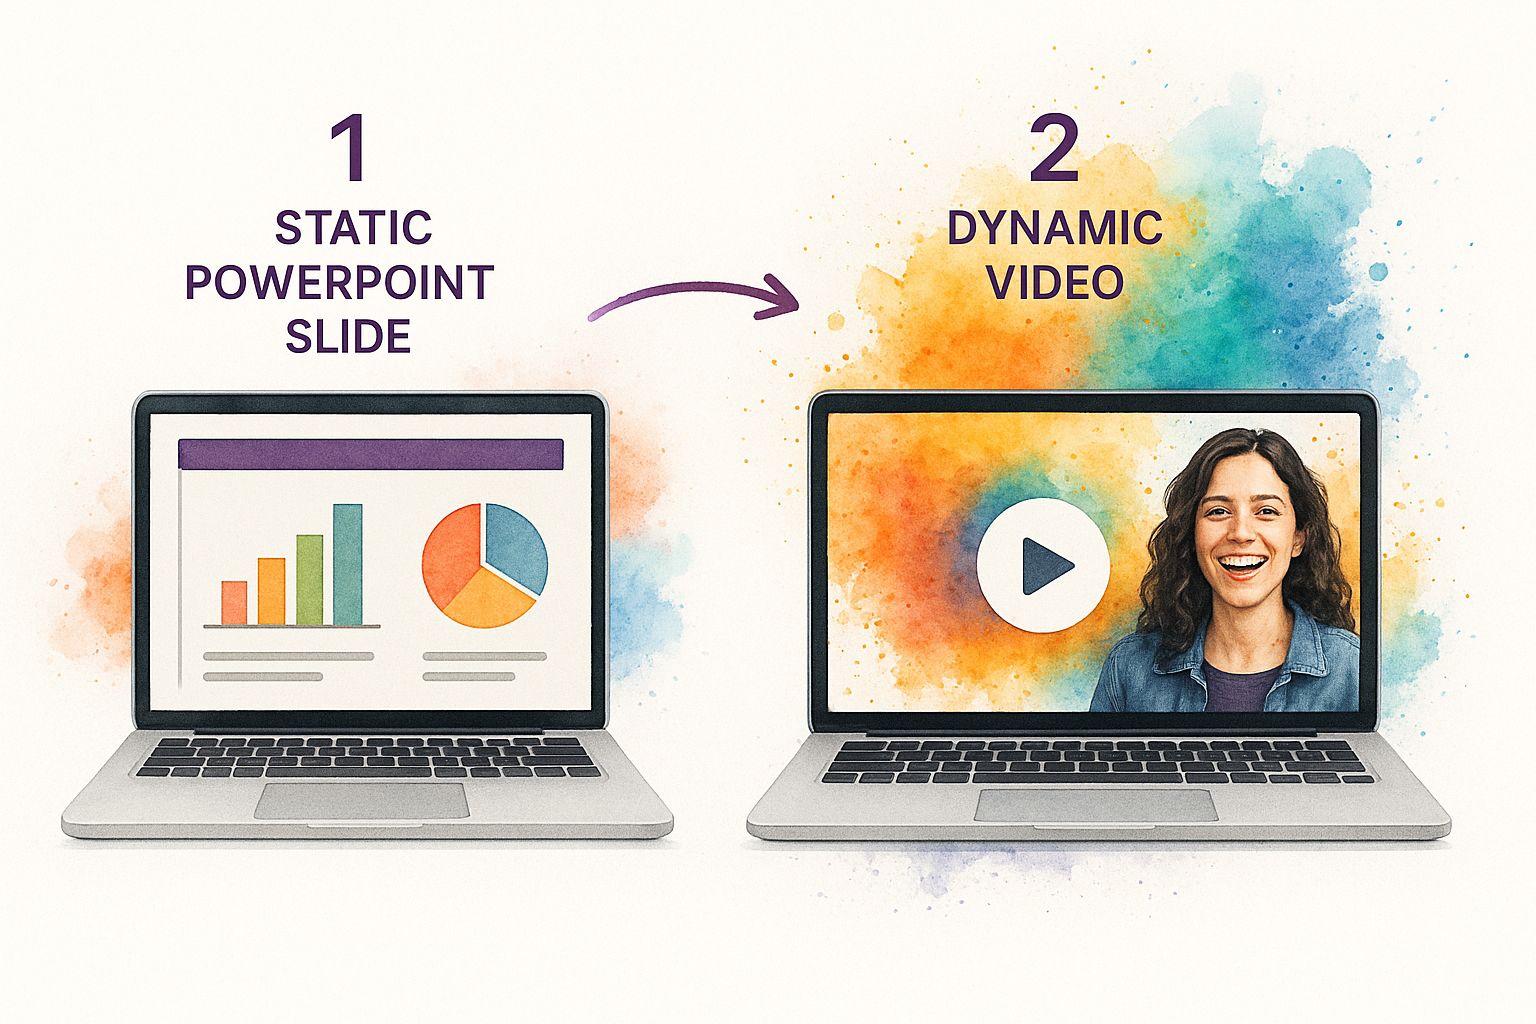
As you can see, the process begins with the initial presentation, which is then layered with AI-powered voice and animation before becoming a polished, shareable video. If you’re curious about turning other static visuals into video, you can explore how to create a video from pictures, which follows a similar principle.
Why Turning Your PPT Into a Video Is a Smart Move
Let’s be honest: how many times have you clicked through a slide deck and felt… bored? Converting that same presentation into a video isn’t just a neat trick; it’s a strategic decision that can dramatically improve how your audience receives your message.
A video is dynamic, shareable, and much easier to consume on the go. Instead of sending a file that needs to be downloaded and manually clicked through, you provide a simple link that can be watched anytime, anywhere. You’re no longer just presenting information; you’re crafting an experience.
When people can both see your visuals and hear your voice, the message sticks. It’s the difference between reading a recipe and watching a cooking show. One gives you instructions; the other makes you feel confident you can actually do it.
See a Real Jump in Engagement and Conversions
This isn’t just about making your content look cooler. When you create a video from your PPT, you’re using a format that flat-out delivers better results. The numbers speak for themselves.
Websites with video see an average conversion rate of 4.8%, a significant jump from the 2.9% for sites without it. Videos also encourage people to stay longer—nearly tripling the time spent on a page—and can earn three times more backlinks.
For marketers, the statistics are even more compelling. A remarkable 87% report that video has directly increased their sales. In fact, companies that use video grow their revenue 49% faster than those that don’t. You can dig into more of this data in Wyzowl’s latest video marketing report.
Make Your Content Work for Everyone, Everywhere
One of the biggest advantages of video is accessibility. A video isn’t confined to a specific time or place. It can be viewed on any device, whenever your audience is ready.
- Learn on Their Own Time: Your team or customers can rewatch the content whenever they need a refresher. This is incredibly valuable for training materials or complex topics.
- Go Beyond Your Initial Audience: Videos are designed to be shared. A presentation that once lived on your desktop can now reach new audiences on platforms like YouTube and LinkedIn.
- Break Down Barriers: With clear audio and subtitles, you make your content accessible to a wider audience, including those with hearing impairments or who speak different languages.
When you turn a presentation into a video, you’re not just reusing old content. You’re creating a versatile asset that can power email campaigns, live on landing pages, and drive engagement on social media for months or even years. It’s about making your hard work pay off long after you’ve given the original presentation.
Preparing Your PowerPoint for Video Conversion
Before you hit that “convert” button, a little prep work on your slides can make a world of difference. A polished video starts with a well-designed presentation. Think of this as your storyboarding phase—get the foundation right, and the rest of the process becomes much easier when you create a video from PPT.
The first step is to declutter. Overloaded slides are a classic mistake; they’re confusing in a live presentation and an absolute disaster in a video. Every slide should have one clear, focused message.
Have a slide with five bullet points? Split it into five separate slides. This simple trick gives each idea its own moment to shine and helps the video’s pacing feel much more natural and engaging.

Optimize Your Visuals and Branding
For a professional-looking video, visual quality is non-negotiable. Always use high-resolution images to avoid that awful pixelated look, which is magnified on video players. This is also the perfect time to lock in your branding.
- Consistent Fonts and Colors: Stick to your brand’s official color palette and fonts across the entire deck. No exceptions.
- Logo Placement: Pick a spot for your logo (like the bottom-right corner) and keep it there on every slide. This small detail adds a huge amount of polish.
This consistency doesn’t just look good; it reinforces your brand identity and makes the final video feel cohesive, not like a jumble of random slides thrown together.
A great presentation tells a story one slide at a time. A great video does the same, but with motion and sound. Make sure your slide sequence flows logically before you even think about adding narration and animation.
Finally, write a clear script. Even if you plan to use an AI voiceover, a solid script is your roadmap. It ensures your message is tight and powerful, and it will guide the timing of animations and transitions so everything syncs up perfectly in the final cut.
How to Use AI Video Generation Tools
Ready to breathe new life into that old slide deck? Using an AI tool to create a video from PPT is surprisingly straightforward. While every platform has its unique features, the core workflow is generally the same.
The process begins the moment you upload your PowerPoint file. Simply drag and drop your .pptx file into the tool’s interface, and the AI gets to work. It scans your slides, extracts the text, and maps everything into a rough video script, typically breaking it down scene-by-scene for each slide.

Now, the creative part begins. Most of these platforms animate static visuals, a process also common in many AI picture to video tools. The AI isn’t just displaying your slides; it’s building a genuine narrative around them.
Selecting Your AI Presenter and Voice
Once the AI completes its initial script analysis, you get to choose your virtual narrator. This step is crucial for matching the video’s tone to your brand and message.
- Choose an AI Avatar: Browse a library of AI-generated presenters. Are you creating a serious business proposal that requires a formal guide? Or a casual social media update that calls for a friendly host? The choice is yours.
- Pick the Perfect Voice: Listen to various AI voices to find one that fits. You can often fine-tune the tone formal, balanced, or casual—to get the delivery just right. Tools like https://lunabloomai.com/ offer extensive libraries, making it easy to find the perfect match.
The goal is to connect with your audience. Choosing an avatar and voice that genuinely align with your content’s purpose makes the entire experience feel less like an automated recording and more like a personal, professional presentation.
Customizing and Refining Your Video
With your presenter selected, it’s time to polish the details. The auto-generated script is a fantastic starting point, but you’ll want to review and edit it to ensure the narration flows naturally.
From there, you can adjust the timing for each scene, making sure the visuals and voiceover sync perfectly. Most tools also let you add background music from a stock library or upload your own track.
Don’t forget the branding! Add your company logo and any other brand elements to make the video uniquely yours. After a few adjustments, you’ll have a professional, polished video ready for your audience.
Exporting and Sharing Your New Video
You’ve successfully transformed a static PowerPoint into a dynamic video. Now for the final step: getting it in front of the right audience. How you handle this last stage can determine whether your video makes an impact or simply collects digital dust.
Let’s start with the technical details—your export settings. Don’t worry, this is simpler than it sounds. You really only need to consider resolution and file format.
For most platforms—like YouTube, LinkedIn, or your company website—1080p is the gold standard. It delivers a crisp, professional look without creating a massive file that takes forever to upload.
If your video is packed with intricate graphics for a large display, 4K is a good option, but be prepared for a much larger file size and longer rendering time. As for the file format, MP4 is your best bet every time. It’s the universal language of video files, compatible with nearly any device or platform.
Getting Your Video Seen
With your video file ready, the work isn’t quite done. Simply uploading it online and hoping for the best is a recipe for disappointment. You need to optimize it for discovery, especially on crowded platforms like YouTube or your company blog.
- Nail the Title: It should be clear, descriptive, and include keywords your audience would actually search for.
- Write a Real Description: Don’t just repeat the title. Use this space to explain what the video covers. Weave in more keywords and relevant hashtags to help the algorithms find you.
- Design a Killer Thumbnail: Your thumbnail is your video’s first impression. Create a custom one that is bright, easy to read, and clearly communicates the video’s value.
Think of your video’s title, description, and tags as signposts for search engines. Taking an extra five minutes to get these right dramatically boosts the odds of your video finding its way to the right audience.
This isn’t just busywork; it’s a core component of modern marketing. Today, 98% of marketers use video in their campaigns, and 87% report a positive return on investment. This massive shift highlights the power of video on platforms from LinkedIn to Instagram, making your new PPT-to-video a seriously valuable asset. To dive deeper into the numbers, you can explore the latest video marketing statistics.
Common Questions About Creating Videos From PPT
Even once you get the hang of turning PowerPoints into videos, a few questions tend to pop up. Let’s tackle some of the most common ones.
Can I Edit the Video After Exporting It?
Yes, absolutely. Once you export your presentation as an MP4 file, it behaves just like any other video file. You can import it into a standard video editor to make more advanced changes.
This is a great option if you need to:
- Add complex effects or transitions not available in your creation tool.
- Trim or re-sequence scenes for different social media platforms.
- Combine your presentation video with other footage, like a customer testimonial or product demo.
However, if you’re using an AI tool like LunaBloom AI, it’s almost always easier to make edits directly within the platform. This keeps elements like the AI avatars and synced voiceovers perfectly aligned, resulting in a much smoother workflow.
What Is the Best Video Resolution to Choose?
This is a classic question that boils down to balancing quality with file size. For nearly all online uses—posting to YouTube, sharing on LinkedIn, or embedding on a blog—exporting in 1080p (Full HD) is your best choice.
1080p hits the sweet spot. It provides sharp, professional quality without creating a massive file that takes ages to upload and process.
So, when does 4K make sense? Only if your presentation contains highly detailed visuals, like intricate diagrams or high-resolution photos, and is intended for a large screen at a conference or in a retail setting. For day-to-day business videos, 1080p is your trusted friend.
How Long Should My Presentation Video Be?
There’s no single magic number. The ideal length depends entirely on your audience and the platform. With attention spans getting shorter, brevity is key.
Here are some general guidelines:
- Marketing and Social Media: Keep it short and engaging. Aim for 1-3 minutes to capture attention and deliver your message quickly.
- Internal Training or Tutorials: These can be longer, as the audience is already invested. A runtime of 5-10 minutes often works well for detailed instructional content.
The golden rule? Stick to one primary idea per video. If your presentation covers multiple topics, consider breaking it into a series of shorter, more focused videos. This approach keeps viewers more engaged than a single, lengthy monologue.
Ready to transform your presentations into captivating videos? LunaBloom AI makes it easy to create professional-quality content with AI avatars, voiceovers, and automatic subtitles in minutes. Start creating your first video for free today!