A professional lighting setup for video is what separates amateur content from polished, high-quality productions. It’s the key to shaping your subject, creating depth, and setting the right mood. The fastest way to achieve this is with the industry-standard three-point lighting technique.
Why Your Video Lighting Matters
Let’s be direct: bad lighting can ruin a great video. It makes your content look unprofessional and distracts viewers from your message. The good news? A great lighting setup isn’t about expensive gear; it’s about understanding how to control light.
Think of three-point lighting as the fundamental recipe behind nearly every professional video you’ve seen. Once you understand this approach, you gain total control over shadows and highlights, which is essential for that polished, cinematic look.
The Three Pillars of Video Lighting
This technique uses three distinct light sources, each with a specific job. Mastering their roles is your first step toward creating a dynamic, professional image.
- Key Light: This is your primary and brightest light source. It does the heavy lifting by illuminating your subject and establishing the overall exposure of the scene.
- Fill Light: Positioned opposite the key light, its sole purpose is to “fill in” and soften the harsh shadows created by your main light. This adds crucial dimension to your subject’s face.
- Backlight: Also known as a rim or hair light, this light is placed behind your subject. It creates a subtle outline that separates them from the background, making them “pop” on screen.
A well-executed three-point lighting setup adds a sense of depth and professionalism you just can’t get with a single light source. It directs the viewer’s eye and makes the subject the undeniable focus.
The demand for high-quality video has fueled massive growth in production tools. The global market for studio lighting equipment is valued at around $2.5 billion as of 2025. Driven by the expansion of film, TV, and online content, this market is projected to reach an estimated $4.2 billion by 2033.
To build a solid foundation, it helps to see these principles in action. You can find some brilliant home office lighting ideas that show practical ways to control light in a typical room. With these core concepts, you’re ready to build a setup that will completely elevate your videos.
Choosing the Right Lights for Your Video Needs
Diving into the world of video lights can feel overwhelming, but it doesn’t have to be. Selecting the right hardware is a critical part of any lighting setup for video, as your choice impacts workflow, budget, and the final look of your content.
The key is to match the tool to the task. Today, three main types of lights dominate the market, each with unique strengths. Let’s break them down so you can build a kit that works for you.
LED Panels: The Versatile Workhorse
LED panels are the Swiss Army knife of video lighting. These flat panels are filled with numerous small LEDs that produce a broad, soft light, making them perfect for interviews, talking-head videos, and general-purpose fill light.
Their biggest advantage is portability. Most are lightweight, can run on batteries, and are easy to set up. This makes them a top choice for creators needing a flexible lighting setup for video on the go.
COB Lights: The Cinematic Powerhouse
COB, or “Chip on Board,” lights operate differently. Instead of many small LEDs, a COB light uses a single, massive, high-powered LED module. This creates a super-bright, focused beam that acts like a single point source, similar to the sun.
This intensity is perfect for crafting dramatic, cinematic looks. They are also highly adaptable—you can attach modifiers like softboxes or snoots to shape the light precisely. If you need to overpower daylight or illuminate a large area, a COB light is the tool for the job.
Ring Lights: The Vlogger’s Best Friend
Ring lights are popular for good reason. Their circular design allows you to place your camera in the middle, casting an even, shadowless light onto your face. It’s an instant shortcut to flattering, close-up shots.
They are incredibly simple to use, which is why they’re a staple for vloggers, streamers, and makeup artists. Plus, they create that signature ring-shaped reflection in the eyes—the “catchlight”—that so many creators love.
Picking the right light boils down to your specific needs. This table breaks down the key differences to help you decide.
Video Light Type Comparison
| Light Type | Best For | Pros | Cons |
|---|---|---|---|
| LED Panel | Interviews, talking heads, general fill light | Soft, even light; portable; often battery-powered; easy to use | Less powerful; limited ability to shape light without modifiers |
| COB Light | Cinematic looks, large scenes, overpowering daylight | Very bright; highly versatile with modifiers; creative control | Harsher light without a modifier; can be more expensive |
| Ring Light | Vlogging, streaming, makeup tutorials, close-ups | Flattering, shadowless light; simple setup; creates a catchlight | Not versatile for lighting anything but a single, close subject |
Ultimately, the light you choose should solve your biggest challenge, whether that’s portability, power, or simplicity.
A Quick Tip
When starting out, focus on your primary use case. If you need maximum versatility for interviews, an LED panel is a safe bet. For creative control and power, choose a COB light. And if you mainly film yourself talking to the camera, a ring light is a fantastic starting point.
The market for these lights is booming. The global market for camera-mounted LED lights was valued at USD 952.59 million in 2025 and is projected to reach USD 1.49 billion by 2030. This growth is driven by their energy efficiency, low heat output, and excellent control.
If you want to dive deeper into the data, you can check out the full research on the LED light camera market. For creators, this trend means more options, better technology, and more competitive pricing.
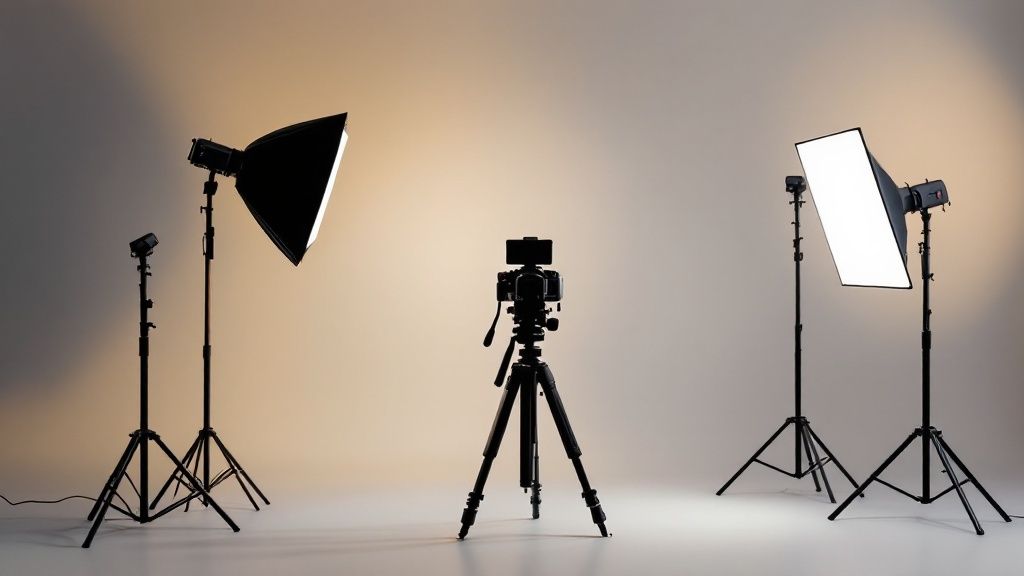
How to Master Three-Point Lighting
Now, let’s get practical. If there’s one skill that will instantly elevate your videos, it’s mastering the three-point lighting setup. This isn’t just an industry trick; it’s a reliable technique used everywhere because it simply works. It’s flattering, provides excellent control, and creates that professional look.
The setup uses three lights—key, fill, and backlight—each with a specific purpose. Let’s walk through how to arrange this system to build a dynamic and professional image.
This infographic provides a great visual starting point, showing how the lights work together.
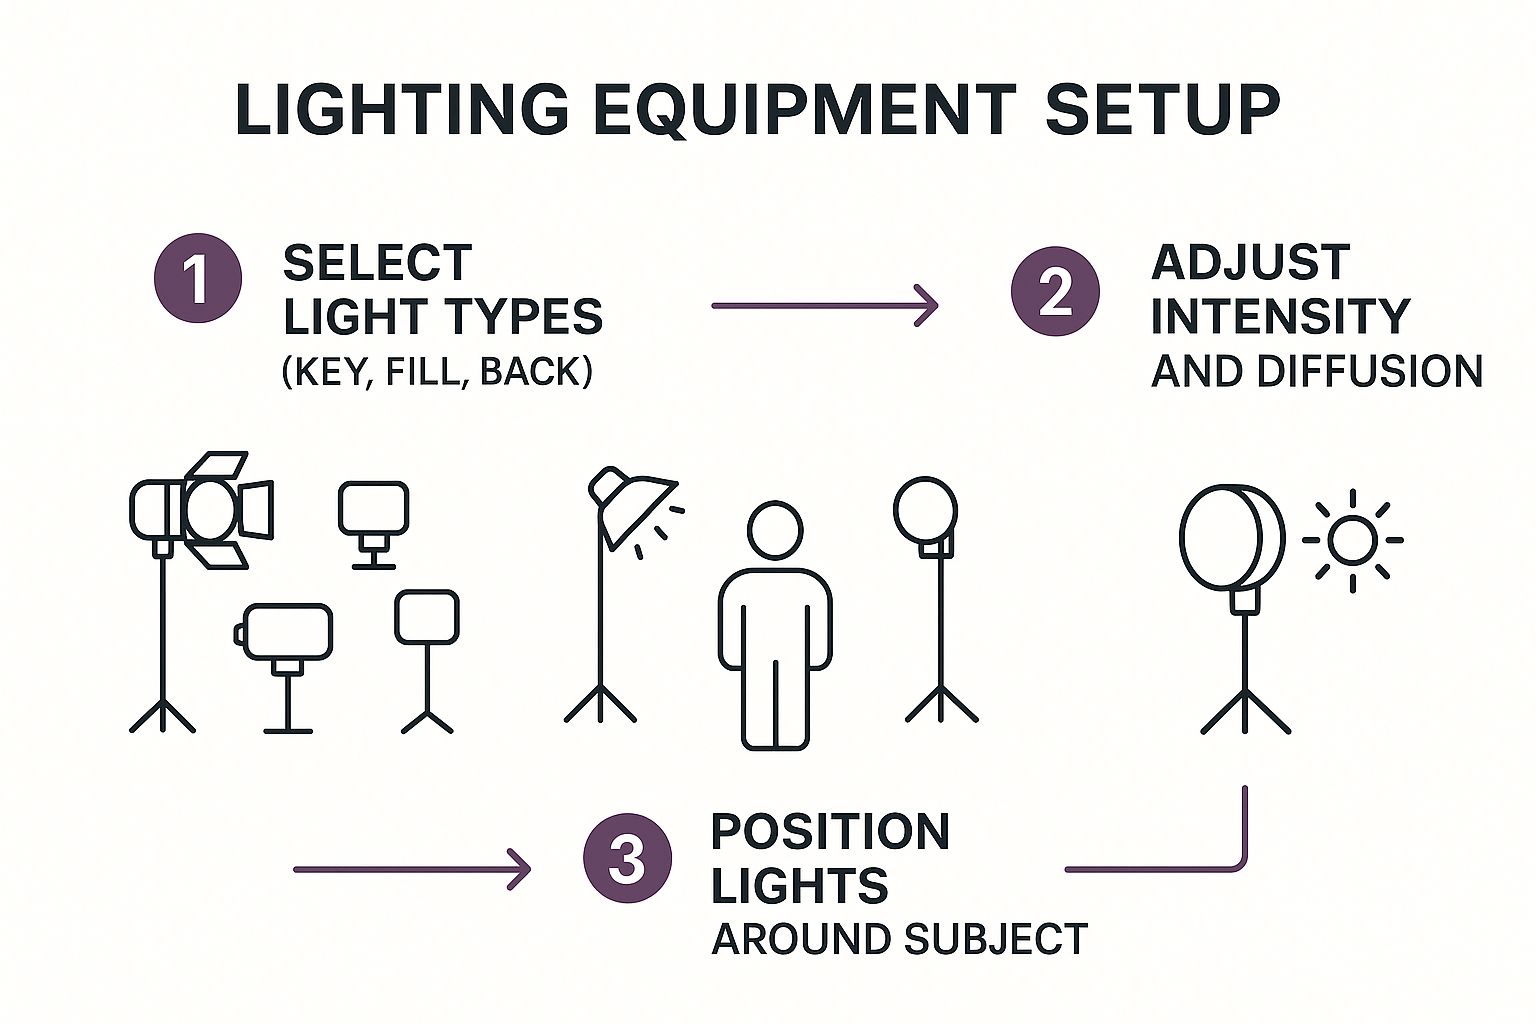
As you can see, great lighting is a thoughtful process of layering light to create shape, depth, and mood.
Step 1: Set Your Key Light
The key light is the star of the show. It’s your main and brightest light, and its placement defines the entire feel of your shot. Always set this light first.
A great starting point is to position it at a 45-degree angle to your subject, off to one side of the camera. You’ll also want to raise it slightly above their eye level and angle it downward. This mimics natural light and creates flattering shadows that add definition.
Step 2: Add Your Fill Light to Soften Shadows
Once your key light is in place, you’ll notice shadows on the opposite side of your subject’s face. The fill light is used to soften these shadows.
Position your fill light on the opposite side of the camera from your key light, also at a 45-degree angle. The most important rule here is that the fill light should never be as bright as your key light.
A good guideline is to set it to about half the brightness of your key light. You don’t want to eliminate shadows completely—you just want to reduce their intensity to reveal detail.
On a budget? You don’t need a second light. A simple white foam board or a 5-in-1 reflector can bounce light from your key light back onto your subject, acting as a perfect, subtle fill.
Step 3: Use a Backlight to Create Separation
The final piece is the backlight, also called a rim or hair light. This is the secret ingredient that makes your subject stand out from the background.
Place this light behind your subject, often high up and angled down, so it’s out of the camera’s view. It should be aimed at the back of their head and shoulders.
When positioned correctly, the backlight creates a subtle, crisp outline around your subject. This halo of light separates them from the background and prevents the image from looking flat.
Shaping Light with Modifiers and Diffusion
The secret to beautiful lighting isn’t just the light source itself—it’s how you shape it. Pointing a bare bulb at someone creates hard light, which is known for its sharp, defined shadows. While useful for drama, it’s often unflattering for people.
Soft light is the solution. It’s diffused light that wraps gently around your subject, creating softer, more forgiving shadows. This is the go-to look for interviews and tutorials because it appears clean and professional. You achieve soft light with modifiers, which make your small light source act like a much larger one.
Essential Light Modifiers
You don’t need a massive budget to shape light like a pro. A few key modifiers can transform your lighting setup for video.
- Softboxes: This is your number one tool for creating soft light. It’s a box with a reflective interior and a white diffusion panel on the front, which spreads your light over a large surface.
- Umbrellas: Umbrellas are a fantastic, budget-friendly option. You can shoot light through them for a soft effect or bounce light off their surface for broader coverage.
- Grids: Also known as egg crates, these fabric grids attach to a softbox. They don’t soften the light but give you precise control over where it goes, preventing spill onto your background.
The single biggest upgrade you can make to a budget lighting kit isn’t a better light—it’s a good softbox. Learning to diffuse your light source properly will have a more dramatic impact on your video quality than almost any other change.
Understanding the difference between hard and soft light allows you to make intentional choices. You can use these modifiers to craft the exact look and feel you want, moving from functional lighting to cinematic, purposeful lighting.
Creative Lighting Setups Beyond the Basics
Once you’ve mastered the three-point lighting setup, you can start breaking the rules to develop a unique style. This is how you use light to tell a story and create a specific mood.
A great way to add character is by using practical lights—light sources that are part of your scene, like a desk lamp or a neon sign. Instead of fighting them, incorporate them into your setup. A warm desk lamp can serve as a motivated key light, making your shot feel more authentic.
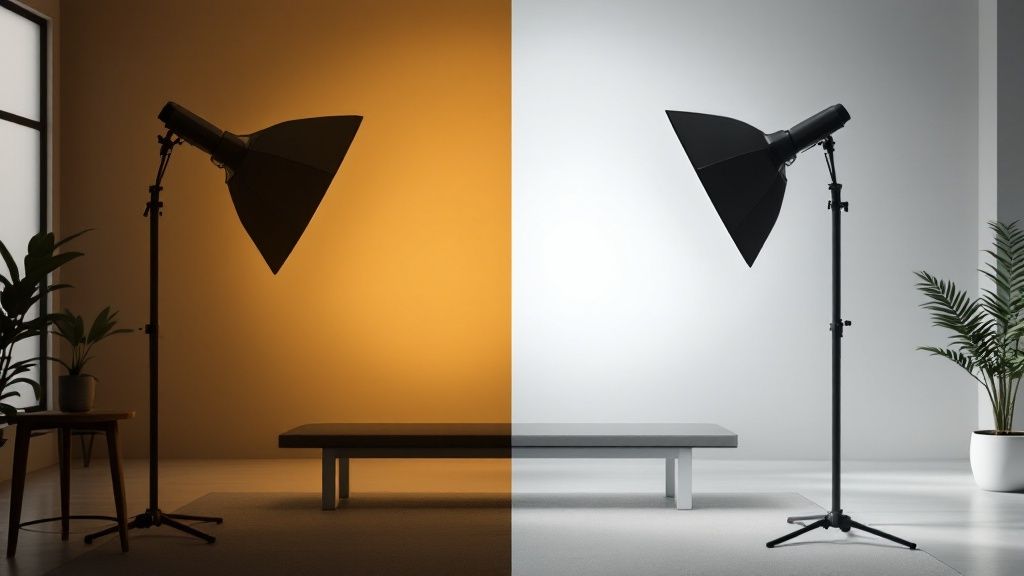
Painting with Color and Mood
Colored gels are the fastest way to change the vibe of your video. These thin, colored sheets placed over your lights can instantly alter the scene’s feel.
Think about the emotions different colors evoke:
- Blues and purples often feel mysterious, calm, or futuristic.
- Oranges and reds can convey warmth, energy, or passion.
- Greens might feel eerie or natural, depending on the context.
Use gels to splash your brand colors on the background, fake a golden-hour sunset, or create a stylized two-tone effect.
The key to creative lighting is intention. Always ask yourself: “What story am I trying to tell with this light?” Every choice, from a harsh shadow to a splash of color, should serve a purpose.
Creating Depth with Background Lighting
A common mistake is letting the background fall into darkness, which makes the scene feel flat. A professional technique is to light your background separately from your subject, creating what is often called a four-point lighting setup.
You don’t need anything fancy. Use a small, dedicated light to add a soft wash on the wall behind you or highlight an interesting object. This simple trick adds incredible depth and makes your lighting setup for video look far more dynamic.
The demand for this kind of gear is growing rapidly. The photography lighting equipment market was valued at USD 5.15 billion in 2024 and is projected to reach USD 7.80 billion by 2033, as more creators seek a high-end look. You can learn more about these market trends if you’re interested.
Common Video Lighting Questions Answered
Even with a solid plan, questions often arise when you’re building your lighting setup for video. Here are answers to some of the most common ones.
What is the best budget lighting setup for a beginner?
For beginners, the best investment is a single, powerful LED light paired with a good softbox. This combination gives you a fantastic key light, the most crucial part of any setup.
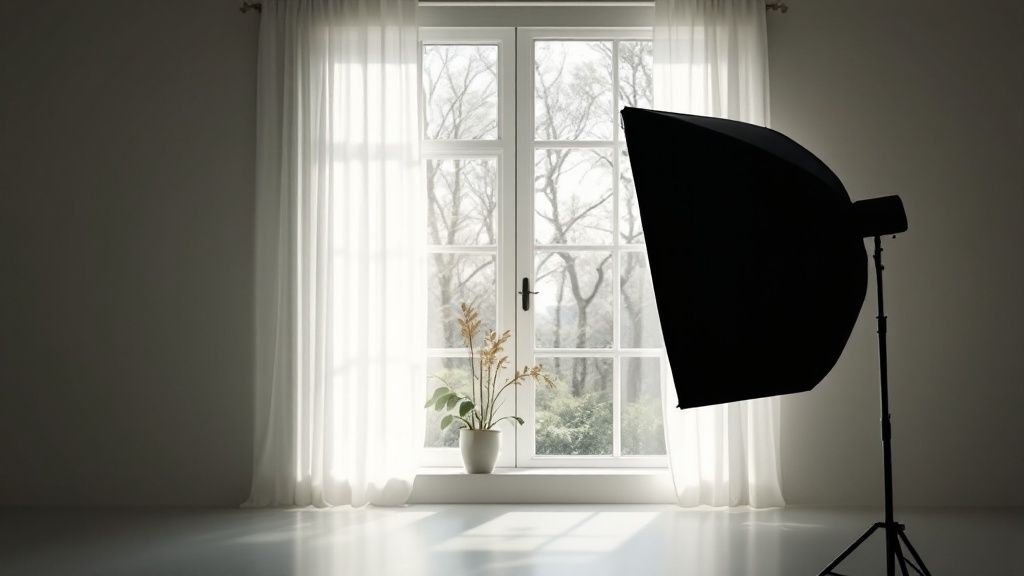
To fill in shadows, you can use an inexpensive 5-in-1 reflector. Even a large white foam board from a craft store works well. Also, don’t forget the power of a window—it can serve as an excellent and free key or fill light. The strategy is to master one quality light source before buying more gear.
How do I get rid of distracting shadows on my background?
Those distracting shadows are usually caused by your subject being too close to the wall. The easiest fix is to move your subject further away from the background.
This adjustment creates more depth and allows the light to fall off before it hits the wall. Another pro trick is to light the background separately. A small, dedicated light aimed at the wall can wash out any remaining shadows and give your shot a cleaner, more professional look.
A common mistake is trying to solve all lighting problems with one light. Separating your subject from the background, both physically and with dedicated lighting, is a key step toward achieving a more professional look.
Can I mix different types of lights in one setup?
Yes, you can, but you must match their color temperature, which is measured in Kelvin (K). If you mix lights with different color temperatures, like a modern LED and an old tungsten bulb, you’ll get unsightly orange and blue color casts in your shot.
The best solution is to use lights with adjustable color temperature. If that’s not possible, you can use corrective color gels on your lights to balance them to the same Kelvin value. It requires a bit of extra effort but ensures a clean, consistent look.
Ready to create stunning videos without the complex setup? LunaBloom AI lets you generate professional-quality videos from text in minutes, complete with customizable avatars and voice cloning. Transform your ideas into captivating content effortlessly.