A script is finished, the deadline is close, and the usual production plan has fallen apart. There's no camera crew, studio, presenter, or spare afternoon for retakes. You still need a clear video that sounds human, looks consistent, and works on the platforms where your audience watches.
An avatar animation maker can turn that script into a narrated video with a digital presenter, animated character, or 3D figure. The useful question isn't only whether the tool can generate a video. It's whether the final result communicates clearly, feels natural, respects the people represented, and remains accessible after export.
What an Avatar Animation Maker Does and Why It Matters
An avatar animation maker is software that converts a script, image, or prompt into a video featuring a digital character. The character may speak with a generated voice or an uploaded recording, move its mouth in time with speech, gesture, and appear over a selected background. Depending on the platform, the output can also include captions, music, branded graphics, and translated voice tracks.
The basic workflow is straightforward:
- Script input: Add the words your presenter should say.
- Avatar generation: Select an existing character or create a custom one.
- Voice synthesis: Choose a stock voice, upload narration, or use an authorized voice clone.
- Final render: Combine the voice, facial performance, background, captions, and visual elements into a finished video.
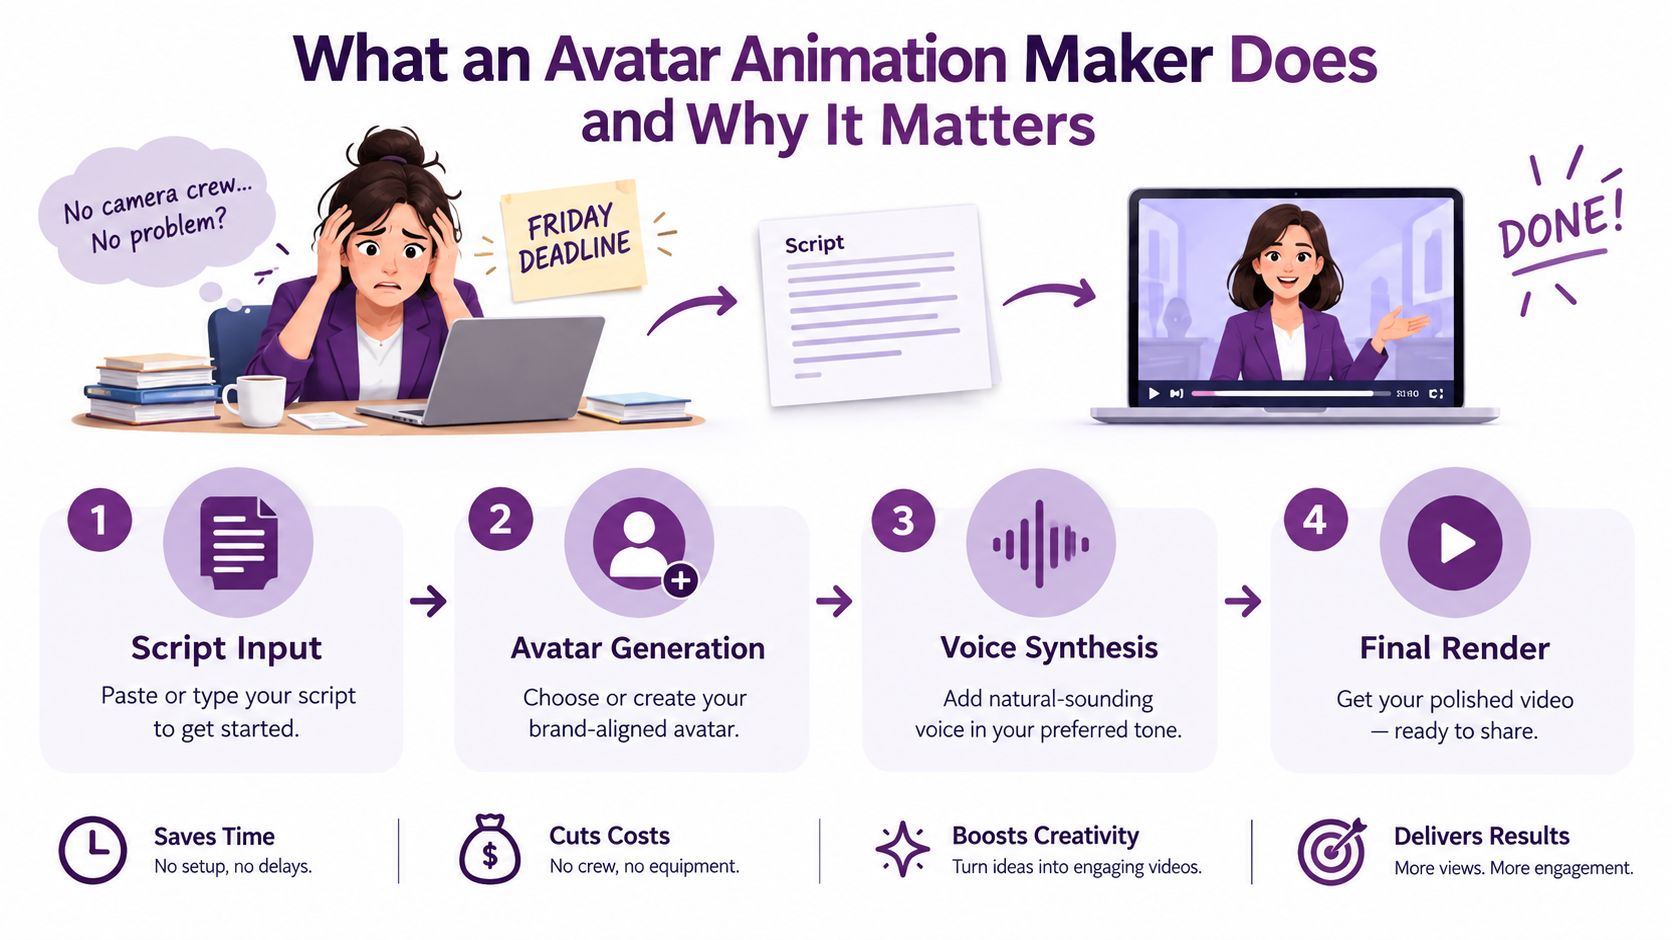
Traditional production asks you to coordinate a presenter, camera, lighting, sound, set design, editing, and revisions. An avatar workflow removes much of that coordination. It doesn't remove creative work, though. Someone still needs to write a useful script, choose the right tone, check pronunciation, review the edit, and decide whether the video matches the audience.
Practical rule: Treat the avatar as a performer inside a production system, not as a replacement for production judgment.
The format suits solo creators, learning and development teams, customer-support departments, agencies, educators, and small businesses that need localized content. A support team might create a troubleshooting explainer. An educator might turn a lesson outline into a visual presentation. A small business might produce several versions of a product introduction for different markets.
This approach belongs to a long technical lineage. Experiments in computer animation began in the 1940s and 1950s, while digital computing made practical computer graphics possible in the 1960s, as documented in the history of computer animation. Modern tools package techniques such as modeling, rigging, facial performance, rendering, and automated generation into a browser-based workflow.
For a closer look at the platform behind this type of workflow, visit LunaBloom AI's company overview. The rest of this guide focuses on the part many tutorials skip: how to judge the finished avatar video like a quality reviewer.
Photo-Real, Animated, and 3D Avatars Compared
Choosing an avatar style is a creative decision before it's a technical one. The most advanced-looking character won't automatically create the most trust. A financial-services tutorial may need calm visual credibility, while a children's explainer may work better with a bright illustrated guide.
Three styles with different jobs
Photo-real avatars imitate the appearance of a human presenter. They fit executive communications, internal training, product announcements, and situations where the audience expects a professional spokesperson. Their realism can support credibility, but small problems with eye movement, skin texture, lighting, or mouth shapes become more noticeable.
Animated avatars use illustrated, stylized, or cartoon-like characters. They're useful for explainers, educational content, children's media, and brands that want a friendly or playful identity. Stylization can also make minor motion limitations less distracting because the audience isn't expecting photographic realism.
3D avatars are rigged or modeled characters that can inhabit a designed environment. They suit game-like worlds, product walkthroughs, virtual demonstrations, and immersive brand experiences. They usually demand more decisions around camera movement, lighting, body motion, and scene design.
| Style | Best Use Cases | Production Complexity | Trust Factor |
|---|---|---|---|
| Photo-real | Executive messages, testimonials, corporate training | Moderate. Realistic details need careful review | Strong when facial motion and voice feel authentic |
| Animated | Explainers, education, children's content, playful brands | Lower to moderate. Stylization simplifies some visual decisions | Friendly and approachable, especially for informal topics |
| 3D | Product walkthroughs, game-like settings, immersive demos | Moderate to high. Rigging, environments, and camera direction matter | Depends heavily on world-building and consistency |
The right choice follows audience expectation. A compliance lesson may lose authority if it looks like a children's cartoon. A playful app tutorial may feel stiff if it uses a formal photo-real presenter in a plain studio.
Create short test scenes before committing to a full project. Use the same sentence with each style and compare three things:
- Tone: Does the character fit the emotional temperature of the script?
- Attention: Does the design help viewers follow the explanation?
- Consistency: Can the character, lighting, wardrobe, and background remain stable across future videos?
The wider creative economy gives these tools a meaningful production context. UN Trade and Development, citing UNESCO data, reports that cultural and creative industries generate almost US$2.3 trillion in annual revenue, equal to approximately 3.1% of worldwide GDP, and account for 6.2% of global employment in the broad sector covered by those figures. The UN Trade and Development report includes activities such as audiovisual media, design, publishing, and performing arts. Avatar tools enter that existing ecosystem as workflow support, not as a substitute for writing, editing, direction, or audience understanding.
Key Features Worth Evaluating Before You Choose
A feature list tells you what a platform includes. A quality review tells you whether those features work on your material. Test the tool with a short script containing long sentences, names, numbers, emotional changes, and words that require visible mouth movement.
Speech quality
Listen for natural pacing, breath placement, pronunciation, and emotional control. A voice can be technically clear but still sound like it's reading every sentence with the same energy.
Try a sentence that moves from explanation to emphasis. Then test a proper name, a technical term, and a phrase in the language your audience uses. If the platform offers voice cloning, look for a clear consent process and documentation about permitted use. A voice clone should never be treated as an ordinary preset.
Facial animation
Watch the mouth at normal speed first. Then replay a close-up at reduced speed and look for delayed consonants, frozen lips, smearing, or a mouth that keeps moving after the voice has stopped.
Research benchmarks use Lip Vertex Error, or LVE, to measure mouth-shape deviation, Mean Vertex Error, or MVE, for overall facial-mesh accuracy, and Upper-Face Dynamic Deviation, or FDD, for brow and eye motion during speech. The facial-animation benchmark research also shows why one score isn't enough. A character can have convincing mouth movement while its eyes and forehead remain unnaturally still.
Production controls
Check whether you can control backgrounds, b-roll, screen recordings, brand colors, lower-thirds, captions, and aspect ratios. A presenter alone rarely explains a product well. Viewers may need to see a dashboard, diagram, interface, or physical action at the exact moment it's mentioned.
A useful trial test is a short onboarding scene. Add a logo, place a product screenshot beside the avatar, change the background, and check whether the editor preserves alignment after revisions.
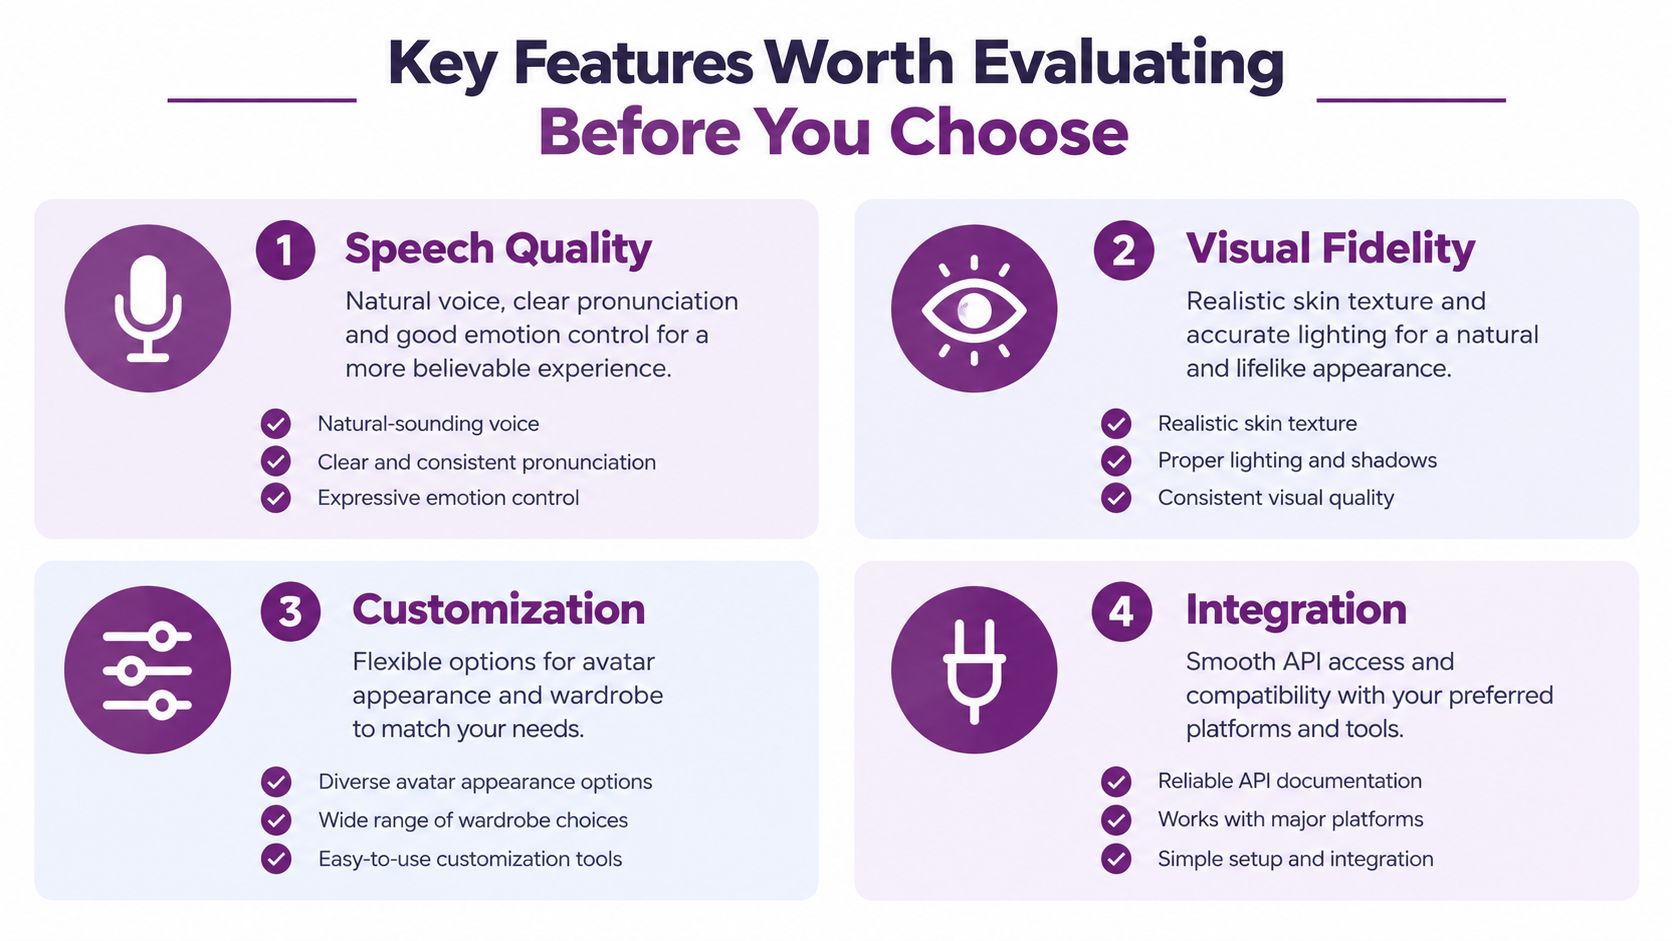
Export and integration
Inspect the final file, not only the preview. Check resolution, caption behavior, audio tracks, watermark rules, file formats, and whether the tool connects with your learning management system, content management system, publishing workflow, or API.
Watch for these red flags:
- Missing consent controls: The platform lets you clone a voice or likeness without recording approval.
- Hard watermarks: The paid workflow still forces a visible mark into important outputs.
- Mid-sentence drift: Lip motion starts correctly but loses timing as the sentence continues.
- Limited revision control: A small script edit forces you to rebuild the entire scene.
- Weak caption editing: You can generate subtitles, but can't fix names, timing, speaker labels, or punctuation.
Rate each bucket from 1 to 5 after the same practical test. A tool with a large avatar gallery may still be a poor choice if its speech quality or export process fails your actual use case. You can review available plans and workflow limits on the LunaBloom AI pricing page.
How to Create an Avatar Video with LunaBloom AI
A short banking lesson makes a useful first test. A two-minute clip explaining card activation can expose script, voice, avatar, caption, and export problems without burying you in a large production.
Start by signing in and opening the avatar video studio in the LunaBloom AI app. Paste a 180-word script made of short, conversational sentences. Cover practical steps such as activating a card, finding security settings, and responding when a transfer needs review. Each sentence should give the voice and facial animation a clear moment to pause.
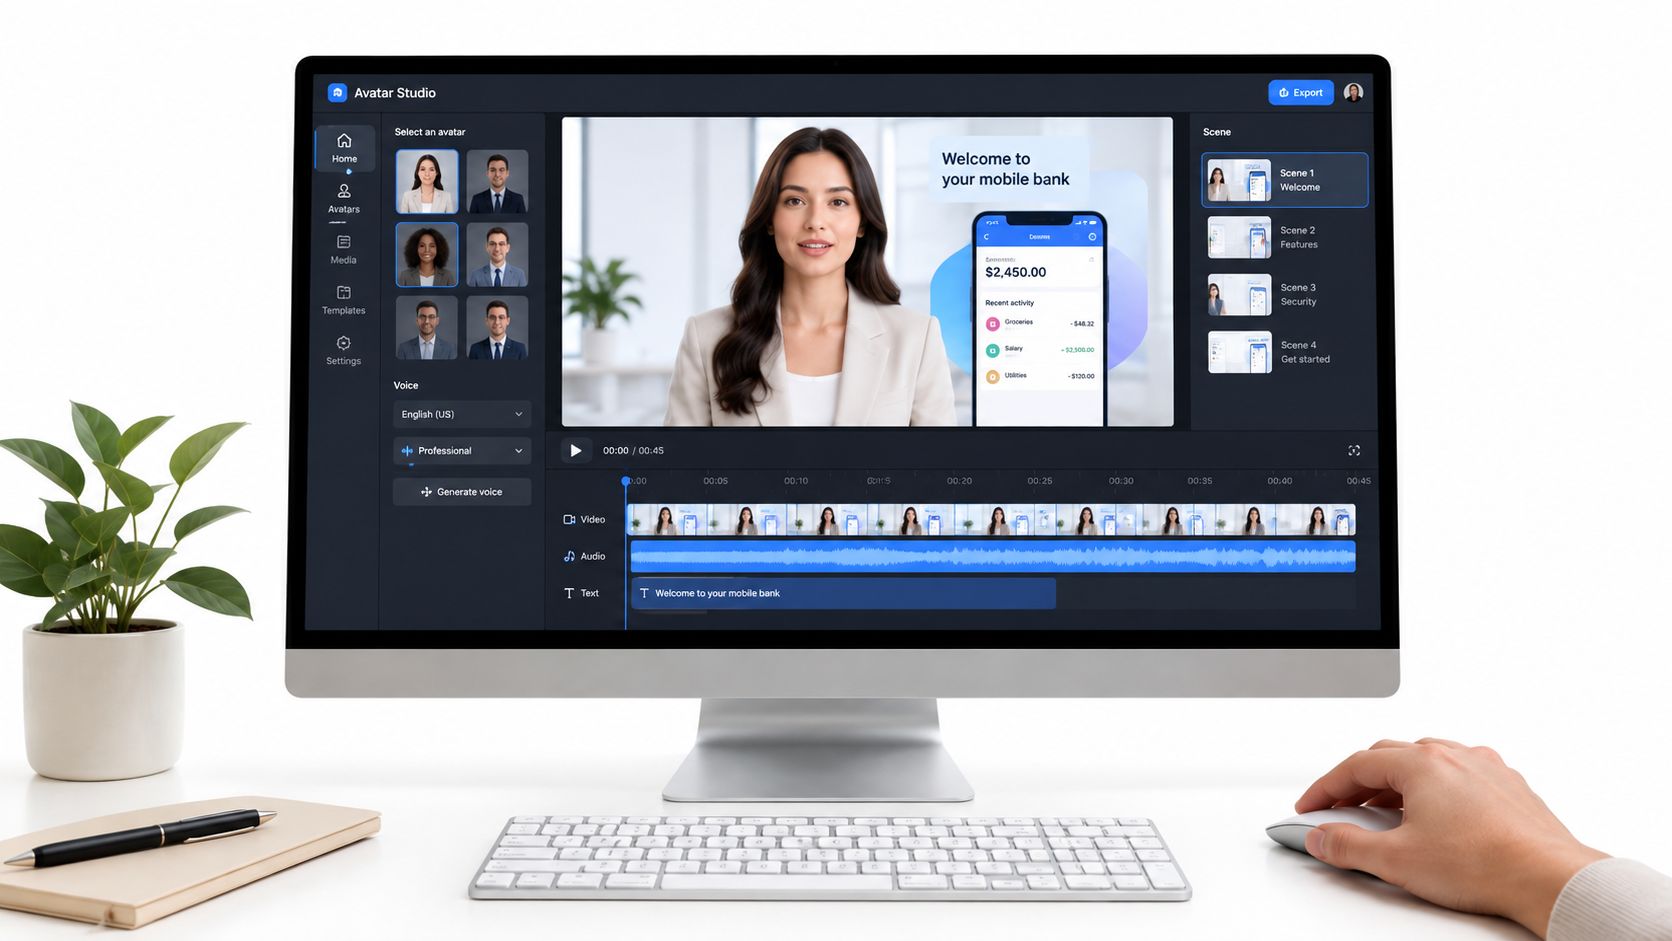
Review the avatar gallery by style, then compare a photo-real executive with a friendly animated mascot. Add a neutral presenter if the audience or subject calls for one. Judge more than appearance. Listen to each preview and rate whether the character's pacing, expression, and authority suit a banking audience. You are reviewing the output as a viewer, not choosing a profile picture.
Build the voice and scene
Select a stock multilingual voice or an authorized cloned brand voice. Correct pronunciations for product names, insert pauses after instructions, and emphasize phrases such as “check your transfer status” or “never share your security code.” These changes can clarify the lesson more effectively than extra visual effects.
Add captions before the final review. Choose a background that supports the instruction, then place a lower-third with the company logo where it will not compete with captions. Select 1080p export for the finished version and prepare versions for an LMS lesson, social post, and email campaign. Check that each placement keeps the speaker, text, and key instructions readable.
The preview may separate voice and facial performance because avatar animation combines different signals. An ACM study of audiovisual facial animation describes facial-expression tracking and speech-to-mouth-shape prediction as distinct processes that are combined in a character rig. In practical terms, visual input can guide eye movement and head pose, while audio provides timing for mouth shapes.
Watch the complete preview before rendering. Mark pauses that arrive too early, captions covered by the lower-third, and pronunciations that sound uncertain. Render the file, then inspect it in the actual LMS player, social feed, and email landing page, since each destination may display the same video differently.
A contained first project gives you a clear review path from script to shareable output. It also reveals workflow weaknesses before a complicated production makes them harder to trace.
Quality Checklist for Natural-Looking Avatar Videos
Review the result with the sound off first, then with the picture hidden, and finally with both together. This separates visual timing problems from voice problems. A polished voice can make weak animation seem better than it is, while expressive motion can distract you from unclear narration.
Lip sync accuracy
Watch emphasized syllables and consonants. Plosives should produce visible mouth closure, while sustained vowels should create a stable shape rather than a quick flicker. Look for lag after a word, mouth movement that continues during silence, and synchronization that gets worse near the end of a sentence.
Objective measures such as LVE and MVE can support a technical review, but human judgment still matters. Compare the avatar's timing with the voice at normal playback speed, then use reduced speed for close inspection.
Facial micro-expressions
A natural face doesn't need constant movement. It does need movement that responds to meaning. Check whether the eyes, brows, forehead, and head angle change when the script shifts from a fact to a warning, question, or invitation.
A frozen stare is distracting in a photo-real presenter. Excessive blinking is just as noticeable. For guidance on how facial movement communicates meaning in professional settings, leadership communication with Intonetic offers useful context for evaluating expression rather than treating it as decoration.
Voice prosody
Read the script yourself and mark the intended emphasis. Then compare the generated performance with those marks. Rate the voice informally on:
- Pacing: Does it give viewers enough time to process each idea?
- Breathing: Do pauses sound placed, or does the voice rush through transitions?
- Emotion: Does the tone match the seriousness, warmth, or energy of the message?
- Pronunciation: Are names, numbers, acronyms, and brand phrases correct?
Framing and language
Check headroom, eye line, lighting, and background contrast. The avatar should look toward the viewer or the relevant on-screen element, not toward an unexplained point outside the frame. Keep the face large enough for viewers to observe the expression and read the captions comfortably.
Test accented words, named products, numbers, and any multilingual sections. If the project includes code-switching, listen for the transition between languages instead of assuming the voice engine will handle it gracefully.
For a quick final review, watch the first 30 seconds side by side with the script and audio waveform. Look once for mouth timing, once for eyes and gestures, and once for captions and pronunciation. This short comparison catches many problems before publication because it forces you to inspect the performance instead of watching passively.
Accessibility, Discoverability, and Ethical Disclosure
A finished avatar video has three publishing responsibilities. It should be understandable to people who can't hear every word, findable by search systems, and honest about how the presenter was created.
Make the video usable
Captions need to include speech and meaningful non-speech audio, such as speaker identification or relevant sounds. W3C's guidance explains that captions for prerecorded synchronized media are required at WCAG Level A, while captions for live media are required at Level AA. Review automatic captions for names, technical terms, punctuation, speaker changes, and timing using the W3C captions guidance.
Captions aren't a substitute for describing important visual information. If the avatar demonstrates an action, displays a chart, or points to a control, add audio description or an equivalent text alternative. A descriptive transcript can combine dialogue with meaningful visual information, which is why W3C distinguishes it from a dialogue-only transcript in its transcript accessibility guidance.
Help people and search engines understand it
Use a descriptive title, accurate summary, transcript, clear thumbnail, and visible chapter labels where useful. Google recommends video metadata and VideoObject structured data that match the actual page and video, including a unique thumbnail, name, description, upload date, duration, and accessible playback or content locations where applicable. Its video SEO documentation also describes Clip and SeekToAction approaches for key moments.
A banking onboarding video might label moments such as account setup, first workflow, and troubleshooting. Those labels help viewers scan the content and give search systems clearer context.
Protect likeness and trust
An original fictional character isn't the same as a digital replica of an identifiable person. Before cloning a face or voice, document explicit consent, permitted channels, languages, duration, and revocation procedures. Secure the source recordings and disclose synthetic media when viewers could reasonably be misled.
Trust deserves careful handling. A 2025 industry survey reported that 86% of creators were actively using generative AI, while 52% used it to create new images and videos, according to the industry survey reference. The same verified source notes that Adobe surveyed more than 16,000 creators across eight major markets, with 69% concerned about content being used to train AI without permission. These figures point to a practical need for consent records and clear disclosure, not just faster generation.
Use this governance checklist before external release:
- Identity: Confirm whether the avatar is fictional, licensed, or based on an identifiable person.
- Consent: Store approval for cloned voices, faces, source footage, and permitted uses.
- Accessibility: Approve captions, transcripts, descriptions, contrast, and keyboard-friendly playback.
- Disclosure: Add a clear synthetic-media notice where context, policy, or regional rules require it.
- Distribution: Confirm that the exported version preserves captions, branding, and disclosure language.
Review the platform's handling of stored media and personal data through the LunaBloom AI privacy information before uploading sensitive recordings.
Putting It All Together and Getting Started
A reliable avatar video follows five decisions:
- Define the purpose: Decide whether the video teaches, sells, supports, or welcomes.
- Match the avatar style: Choose photo-real, animated, or 3D based on audience expectation.
- Evaluate the features: Test speech, facial motion, production controls, and export.
- Build the workflow: Move from script to voice, avatar, captions, scene design, and render.
- Run quality and governance checks: Review timing, expression, accessibility, discoverability, consent, and disclosure.
Use a short action plan for your first session:
- Write one focused script and mark the words that need emphasis.
- Preview several avatar styles with the same sentence.
- Render a short draft and inspect mouth movement, eyes, pacing, and captions.
- Correct names, pauses, framing, and brand elements.
- Export the approved version and check it where your audience will watch it.
New creators often skip the brand-consistency check because the avatar looks polished on its own. Others trust automatic captions without reviewing timing. The checklist prevents both mistakes by making the final review concrete.
You can begin with the LunaBloom AI starter app, create a small script-led project, and judge the output with the same reviewer mindset used for a larger campaign. The aim isn't to make every avatar look human. It's to make every video clear, appropriate, accessible, and believable for its intended audience.
LunaBloom AI helps creators and teams turn scripts, prompts, and images into edited avatar videos with voices, captions, animation, and publishing controls. Visit LunaBloom AI to create a first project, test the quality checklist, and export a shareable video you can use the same day.