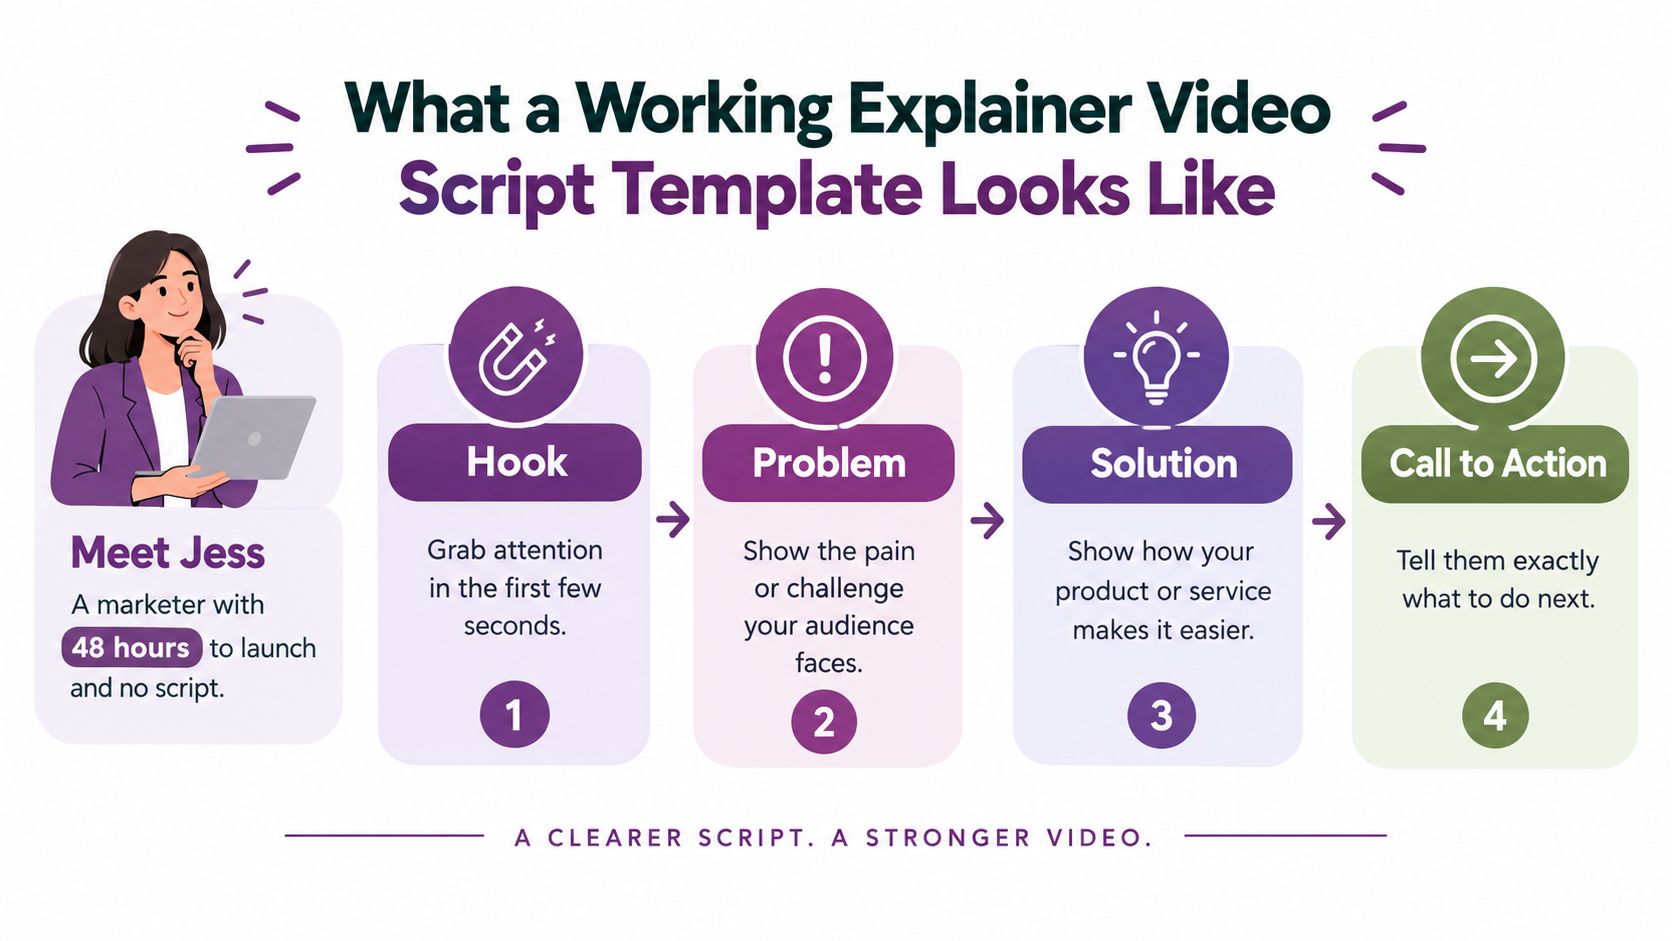
A launch is less than two days away. Jess has the product brief open, a folder of brand assets beside it, and a blank document that still contains no usable narration. The fastest way forward isn't to search for a perfect creative concept. It's to give the message a working shape, write the audio and visuals together, then revise against time.
A practical explainer video script template turns one product idea into a sequence a writer, designer, editor, or AI video tool can use. The template below starts with the familiar Hook, Problem, Solution, and CTA arc, then extends it into production details, onboarding, localization, and short-form adaptations.
What a Working Explainer Video Script Template Looks Like
Jess needs a draft she can paste into Google Docs or Notion, not another theory lesson. Start with five fields for every scene:
| Scene | Voiceover | Visual | On-Screen Text | Duration |
|---|---|---|---|---|
| Hook | Name the audience's immediate problem or desired result. | Show the problem in one recognizable moment. | One short promise or question. | 0:00–0:08 |
| Problem | Explain what makes the situation frustrating or costly. | Show friction, delay, confusion, or repetition. | One pain point. | 0:08–0:20 |
| Solution | Introduce the product and its central mechanism. | Show the product solving the problem. | Product name or core benefit. | 0:20–1:08 |
| CTA | Tell viewers exactly what to do next. | Show the button, URL, or next screen. | Action-led CTA. | 1:08–1:28 |
For a short first draft, use these targets:
- Hook: 12 to 15 words
- Problem: 15 to 20 words
- Solution: 80 to 100 words
- CTA: Under 10 words
Those targets are a starting point, not a substitute for reading aloud. The benchmark for explainer videos found a median length of 88 seconds, with most videos fitting between 60 seconds and 2 minutes. That runtime benchmark explains why a usable template needs modular scenes rather than a dense paragraph.
Copy this skeleton into your project document:
PROJECT:
AUDIENCE:
ONE CORE MESSAGE:
ONE CTA:
MASTER FORMAT:

SCENE 1, HOOK
Timecode:
Voiceover:
Visual:
On-screen text:
Duration:

SCENE 2, PROBLEM
Timecode:
Voiceover:
Visual:
On-screen text:
Duration:

SCENE 3, SOLUTION
Timecode:
Voiceover:
Visual:
On-screen text:
Duration:

SCENE 4, CTA
Timecode:
Voiceover:
Visual:
On-screen text:
Duration:
Keep the first version plain. If the product is complex, a specialist resource on hiring a startup creative agency can help when the project needs broader concepting, production, or brand development. For a quick internal draft, start with the LunaBloom AI starter app, then make the script specific enough that someone else can produce it without asking what each scene means.
The Hook Problem Solution CTA Structure and Why It Works
The four-part structure works because it follows the viewer's practical decision path. First, give them a reason to pay attention. Then name the problem they recognize, show the solution, and finish with one action.
A useful timing reference comes from the 88-second median identified in the explainer video benchmark. At a conversational delivery speed of 125 to 150 words per minute, the full runtime allows roughly 183 to 220 spoken words, calculated from the benchmark duration and the pacing guidance in this explainer script guide. That range is a ceiling, not a target. Pauses, emphasis, UI demonstrations, and transitions also need room.
| Beat | Working time | Target words | Cognitive job |
|---|---|---|---|
| Hook | 0–8 seconds | 12–20 | Earn attention with a specific tension |
| Problem | 8–22 seconds | 25–35 | Make the viewer feel understood |
| Solution | 22–62 seconds | 80–105 | Explain the mechanism, not every feature |
| How it works | 62–78 seconds | 35–45 | Show the simplest useful workflow |
| CTA | Final seconds | Under 12 | Give one verb-led next step |
The hook earns attention through relevance, not volume. “Your team has the content, but turning it into a video takes hours” is more useful than a dramatic claim that doesn't identify the viewer's situation.
The problem section should build stakes without repeating the hook. Give it enough space to establish why the old process fails, then move on. If the solution starts too early, the product feels unearned. If the explanation stays in the problem too long, the video becomes a complaint rather than a demonstration.
Production rule: Every beat needs a job. If a sentence doesn't attract, clarify, demonstrate, prove, or direct, cut it.
Use one proof point when the format allows it. Avoid stacking testimonials, features, awards, and metrics into the same short runtime. The four-part timing framework is useful precisely because it forces a trade-off. You can't explain everything, so choose the one idea that makes the next action feel reasonable.
For a deeper look at the people and product thinking behind a project, use LunaBloom AI's about page as a reference point when shaping your own brand explanation.
A 60 Second Walkthrough Example You Can Copy
ScheduleTracks is a fictional scheduling tool for freelancers. Its audience doesn't need a tour of every setting. They need to see how scattered commitments become one manageable calendar.
| Time | Approx. words | Voiceover | Visual cue |
|---|---|---|---|
| 0–5 seconds | 12 | “Still checking three calendars before you accept one freelance project?” | Show three crowded calendar windows overlapping. |
| 5–18 seconds | 30 | “Client calls, personal appointments, and project deadlines live in different places. You lose time checking conflicts, and a missed update can create a day of unnecessary reshuffling.” | Highlight conflicting events, then show a freelancer switching between tabs. |
| 18–28 seconds | 25 | “ScheduleTracks brings your commitments into one clear workspace, so you can see what's open before you promise a delivery date.” | Transition to the ScheduleTracks dashboard. |
| 28–38 seconds | 24 | “Drag a task onto an open slot, adjust the duration, and move it when a client changes the brief.” | Demonstrate a drag-and-drop task moving across the calendar. |
| 38–48 seconds | 23 | “Your connected calendars stay in sync, while project blocks and personal events remain easy to separate at a glance.” | Animate a calendar sync, then apply different colors to event types. |
| 48–58 seconds | 24 | “Plan the week from one view and keep every commitment visible before the work begins.” | Show the completed weekly view with clear time blocks. |
| 58–60 seconds | 7 | “Create your first ScheduleTracks calendar today.” | End frame with product name and action button. |
This draft totals approximately 145 spoken words, which sits within the conversational 60-second range described in the script-writing guidance from Levitate Media. The visual track does more than decorate the narration. It carries the dashboard details, interaction, and calendar state so the voiceover can stay concise.
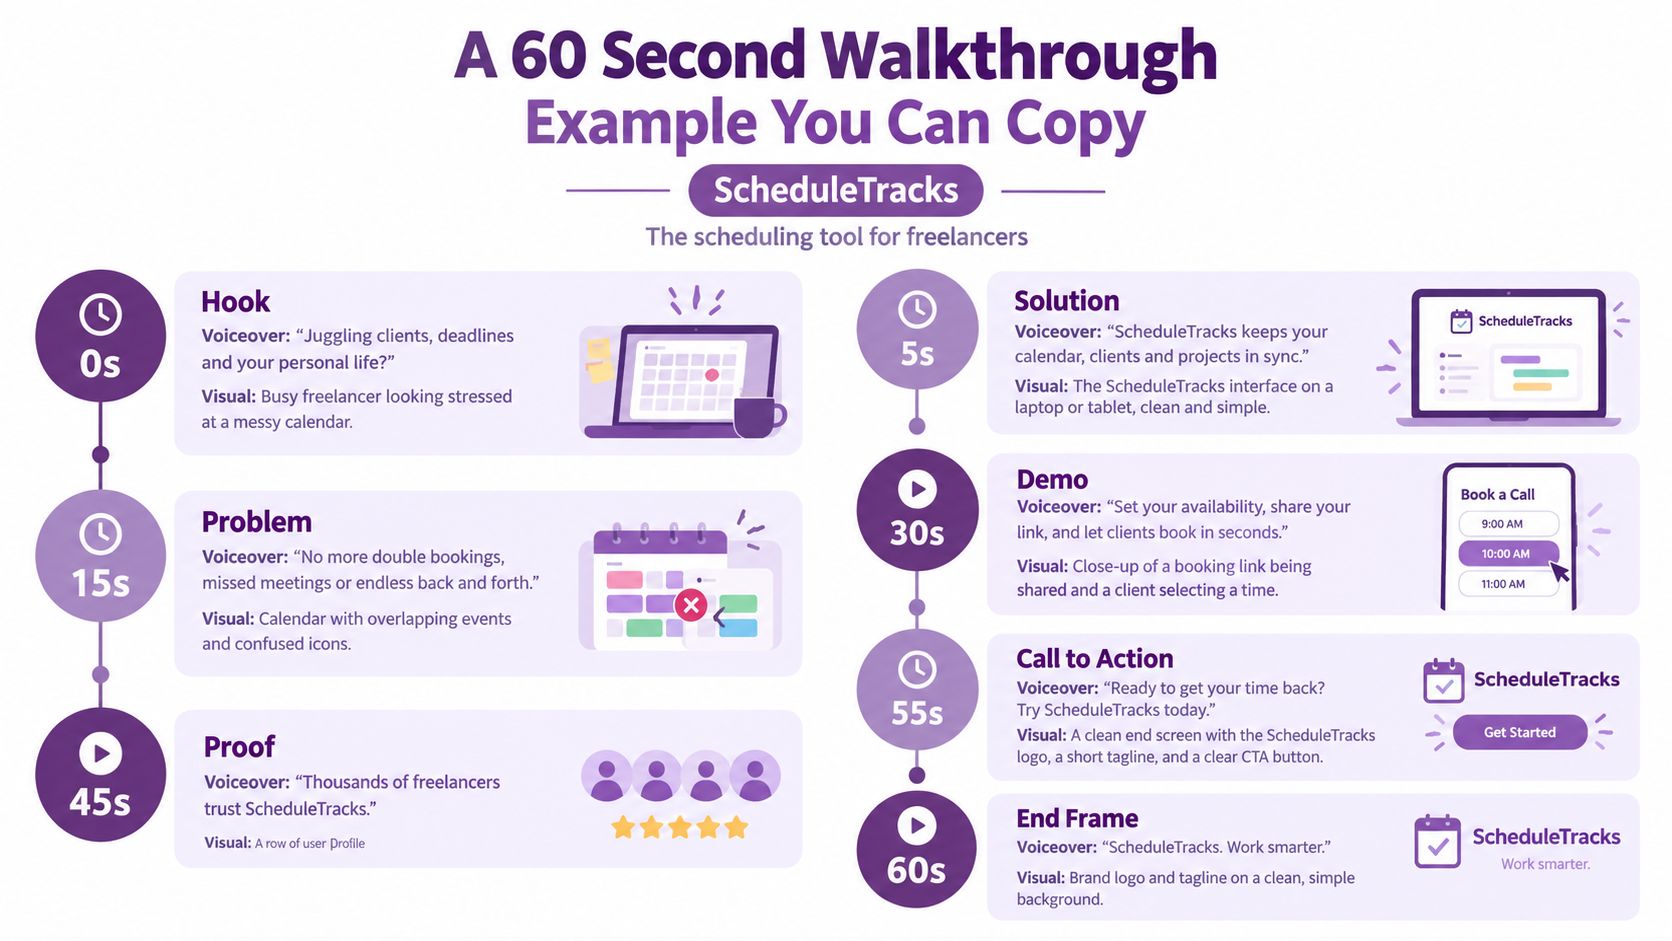
The full script is short enough to read quickly, but each row gives the editor a decision. There's no ambiguity about what appears, when it appears, or which words need emphasis.
If the voiceover runs long during recording, don't speed up the narrator first. Cut repeated words, remove secondary benefits, or let the screen demonstrate a point visually.
Writing the Two Column A and V Script Format
A voiceover-only document tells the narrator what to say. A storyboard tells the visual team what to make. A two-column A/V script connects both tracks, which makes it easier to identify gaps before recording or animation begins.
Use four practical fields:
| Timecode | Audio and words spoken | On-screen text | Visual action |
|---|---|---|---|
| 0:15–0:30 | Explain one idea in natural speech. | Reinforce the key phrase. | Show the action that proves it. |
In Google Docs, give the audio column enough width for readable narration and the visual column enough space for production notes. In Notion, keep timecode narrow, audio medium, and visual direction wide. Add aspect ratio labels at the top, such as 16:9 master, 9:16 vertical, and 1:1 square, so the visual team doesn't design a scene that only works in one crop.
A 15-second row might look like this:
| Timecode | Audio and words spoken | On-screen text | Visual action |
|---|---|---|---|
| 0:20–0:35 | “Upload your source document, review the generated outline, and adjust the scenes before you render.” | Upload. Review. Render. | Drag document into upload panel, show outline, open scene editor. |
Write visual cues as compact verb phrases:
- Open the upload panel
- Highlight the outline
- Drag task to Friday
- Show synced calendar
- Reveal the final CTA
Avoid directions such as “Make this feel modern and engaging.” That instruction gives the editor no visible action. Specify the screen, movement, transition, color, or object instead. Reserve the lower part of the visual column for b-roll, transitions, music cues, and licensing notes.
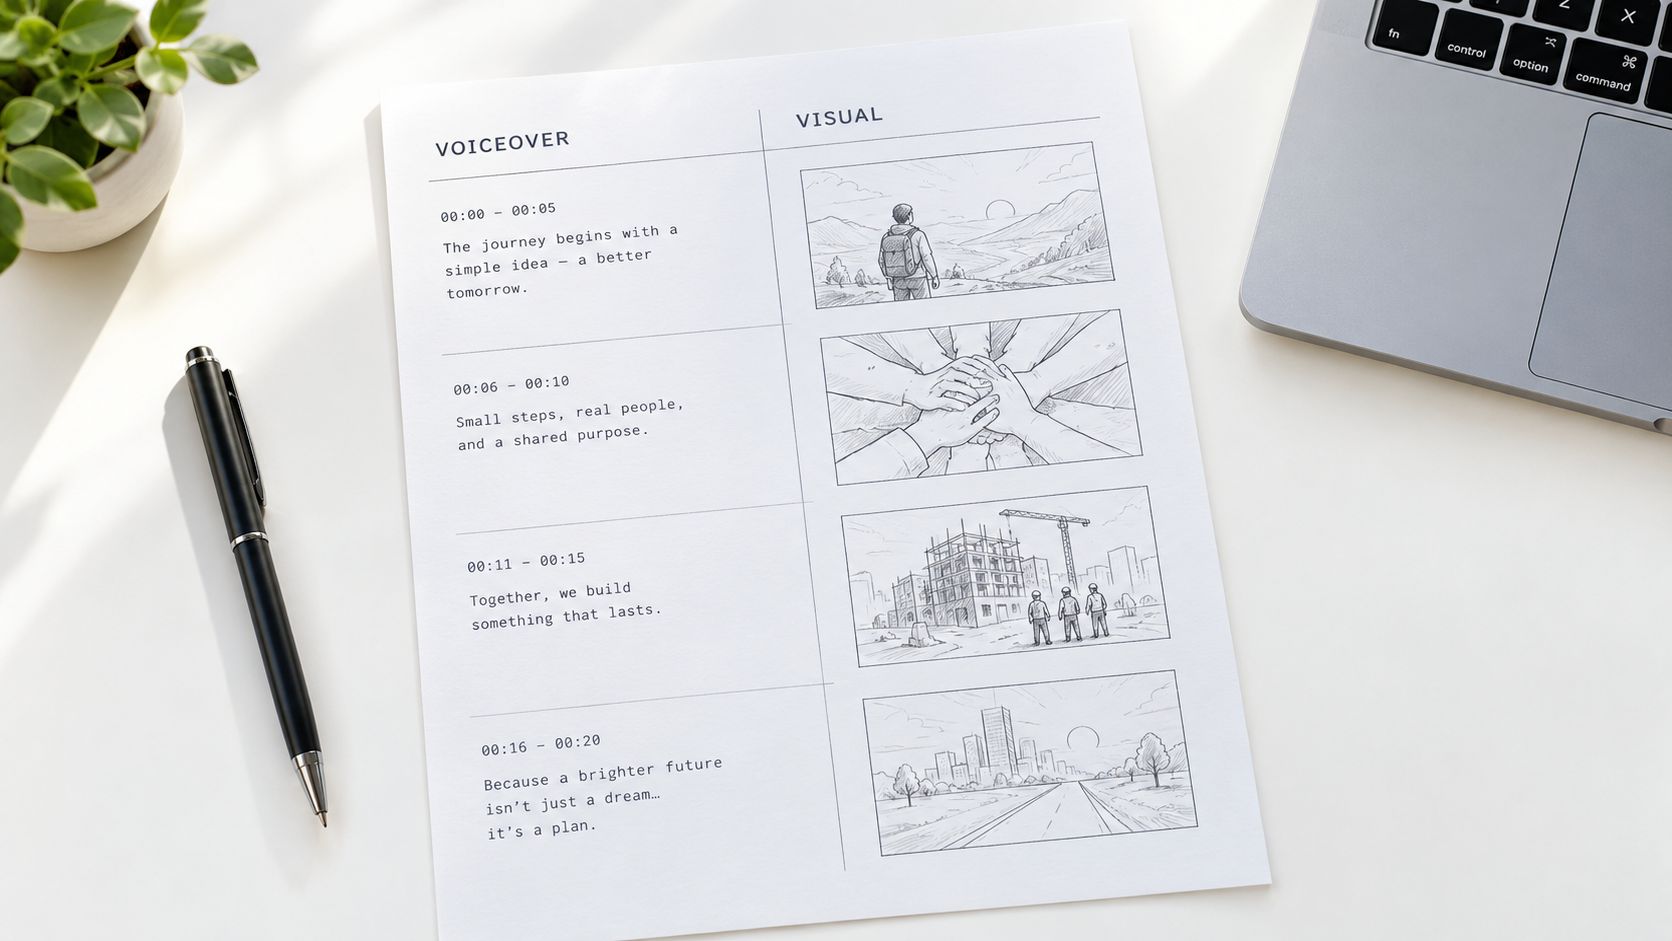
Three problems appear repeatedly in production documents:
- Over-detailed directions: Describe the essential action, not every pixel.
- Missing timecodes: Without timecodes, the editor can't check pacing against the recording.
- Unlabeled formats: A 16:9 composition may hide text or UI when cropped vertically.
If the project needs formal presentation pages, use a resource that shows how to format a script title page. For an AI-assisted production workflow, the LunaBloom AI app can sit after this planning stage, using the structured script as the source for voice, scenes, captions, and edits.
Adapting the Template for FAQ and Onboarding Videos
A marketing explainer persuades a new viewer. An FAQ video answers a specific question. An onboarding video helps a first-time user complete one task. The same four-part arc can serve all three, but the emphasis changes.
The need for onboarding content is easy to understand. A script resource focused on explainer formats identifies FAQ and onboarding as less commonly covered than the standard hook, problem, solution, and CTA structure. That gap matters because viewers often need practical setup guidance, not another list of product benefits.
Script Beats by Format
| Beat | Marketing | FAQ | Onboarding |
|---|---|---|---|
| Hook | State the buyer's pain or desired result. | Ask the exact user question. | Name the setup friction. |
| Problem | Explain why the current approach fails. | Clarify the confusion or misconception. | Show what remains blocked. |
| Solution | Present the product and central benefit. | Give the direct answer first. | Demonstrate one task step by step. |
| How it works | Show the core workflow. | Add only the UI needed to answer. | Insert product captures at each tap-level step. |
| Proof | Use one credible outcome or use case. | Show the relevant setting or example. | Confirm the successful state. |
| CTA | Start, book, download, or try. | Open the help article or feature. | Complete the next action inside the product. |
For a 90-second onboarding video about connecting a calendar, the narration might follow this sequence:
- Hook: “Your workspace is ready, but your schedule still looks empty.”
- Problem: “Until you connect a calendar, the system can't show conflicts or place new tasks safely.”
- Solution: “Open Settings, choose Calendar, and select Connect.”
- Step one: “Pick your calendar provider and approve access.”
- Step two: “Choose which calendar should receive scheduled tasks.”
- Step three: “Return to your workspace and confirm that your events appear.”
- CTA: “Connect your calendar and schedule your first task.”
Each 15-second beat should answer one practical question. Drop broad brand claims, long proof sections, and secondary features. Expand the UI capture instead, especially where permissions, dropdowns, or confirmation states can confuse a new user.
FAQ scripts often beat the standard marketing template on support pages, paid social where viewers expect the post itself to answer the question, and feature pages that already earn the click. If the question depends on account details or a human decision, direct the viewer to contact LunaBloom AI rather than forcing every scenario into a generic video.
Voiceover Pacing and Localization for Global Audiences
Pacing is a production variable, not a mood. English explainer narration commonly works around 125 to 150 words per minute, as described in expert script pacing guidance. Write the English master, record a rough read, and time the pauses before you lock scene durations.
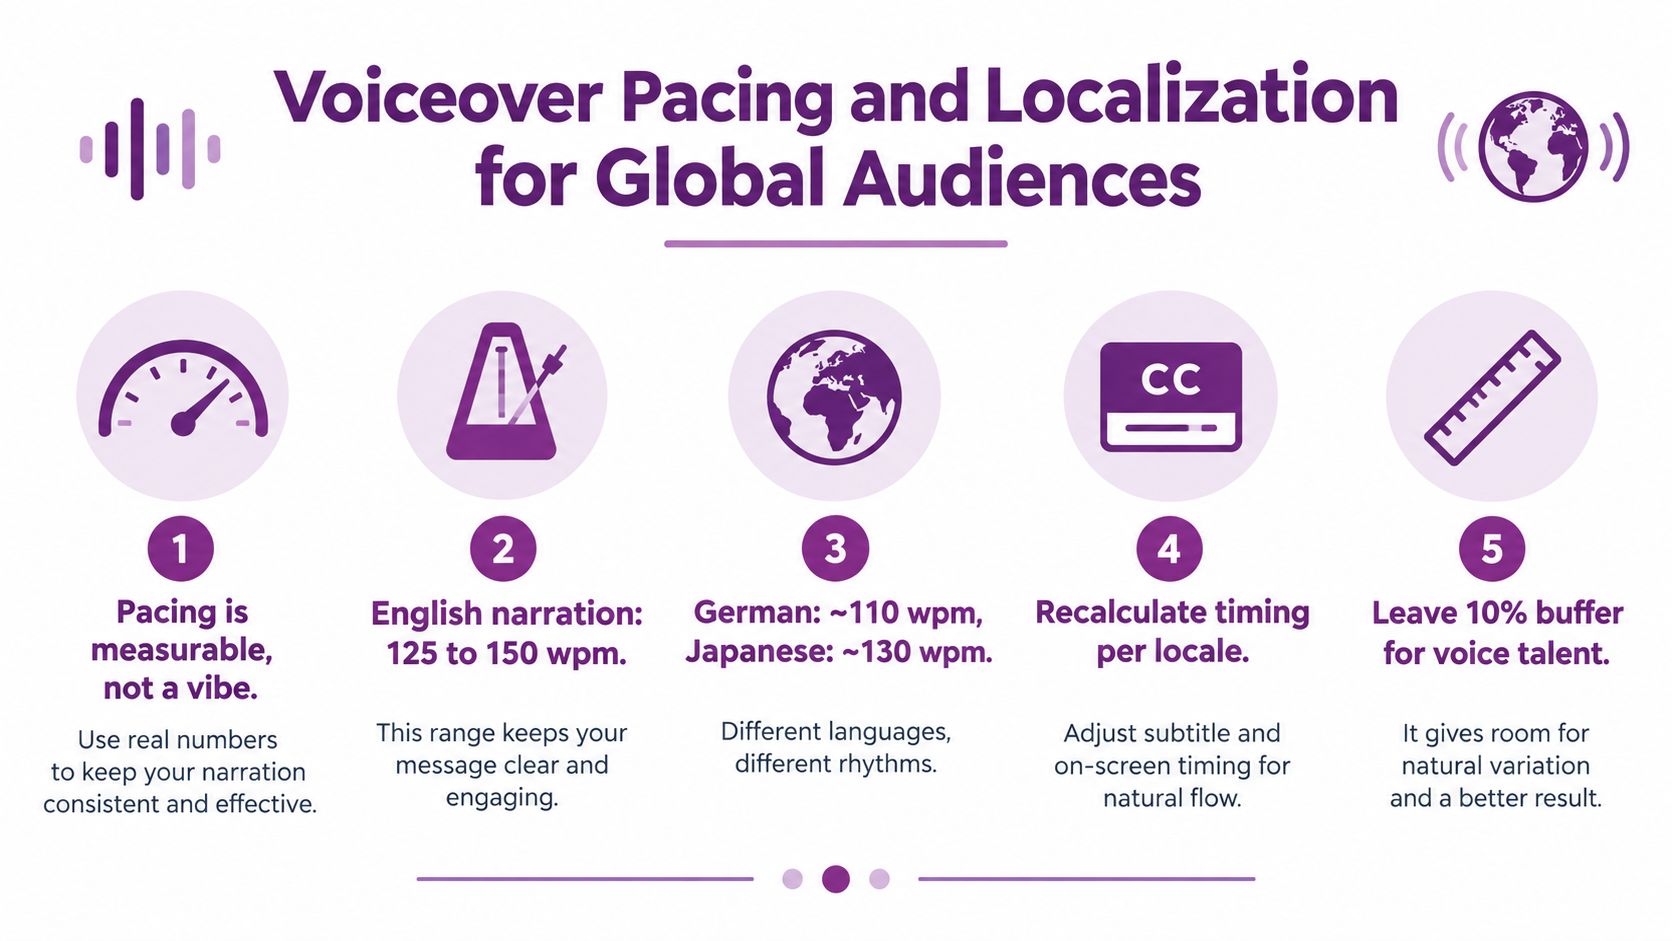
Don't translate a crowded script and hope the timing survives. Leave room for language expansion, pronunciation, pauses, and local phrasing. Translation-friendly copy uses short sentences, literal wording, consistent product terminology, and placeholders that can accept regional date, currency, and measurement formats.
Choosing an AI voice
Choose the voice after defining the brand character. A support onboarding video may need a calm, patient delivery. A product launch may need more energy, but speed shouldn't make the words difficult to follow.
Listen for:
- Natural breaths: Pauses should sound intentional, not inserted between every sentence.
- Stable pronunciation: Product names and technical terms must remain consistent.
- Controlled emphasis: Highlight the action or benefit, not every noun.
- Useful silence: Leave room for a screen transition or cursor movement.
SSML or platform-specific pause and emphasis tags can help, but use them sparingly. A script that requires markup on nearly every sentence usually needs simpler writing first.
Planning every format
Build a 16:9 master, then plan the 9:16 vertical and 1:1 square versions before production. Keep essential UI, faces, captions, and CTA buttons inside a shared safe area. A scene that looks balanced on desktop may become crowded on a portrait phone.
Localization rule: Translate the message, not just the words. Preserve the action, hierarchy, product terms, and visual proof in every locale.
Keep subtitles short enough to scan on a portrait screen. Break lines at natural pauses, avoid placing critical text over busy UI, and give each caption enough screen time to be read without competing with the voiceover. For teams comparing production options, review LunaBloom AI pricing only after you know the required languages, aspect ratios, voice variants, and revision workflow.
Final Checklist and Common Script Mistakes to Avoid
Use this pre-production checklist before anyone records:
- Brief alignment: Name the audience and use case.
- Core message: Reduce the video to one central idea.
- Viewer pain: Use the audience's own situation.
- Hook test: Write more than one opening and choose the clearest.
- Problem boundary: Include only the problem relevant to this video.
- Solution clarity: Explain the mechanism in plain language.
- Feature discipline: Keep secondary features out of the main story.
- Word count: Check narration against the intended runtime.
- Read aloud: Time the script with a natural voice.
- A/V columns: Complete audio, visuals, text, and timecodes.
- Visual specificity: Use visible actions rather than vague direction.
- On-screen text: Keep it shorter than the spoken explanation.
- Proof selection: Use one proof point that supports the message.
- CTA strength: Start the CTA with a clear verb.
- Aspect ratios: Review 16:9, 9:16, and 1:1 requirements.
- Voice review: Check pronunciation, breath, pauses, and emphasis.
- Caption review: Check line breaks, contrast, and timing.
- Final handoff: Label assets, versions, music, and usage notes.
Seven failures account for most weak drafts:
- Opening with company history: Start with the viewer's problem, then earn the right to introduce the company.
- Cramming three ideas into the hook: Choose one tension and make the first frame prove it.
- Using unexplained jargon: Replace internal terms with language a first-time viewer understands.
- Writing visual cues that describe nothing: Name the screen action, object, movement, or transition.
- Ignoring format differences: Recompose scenes for vertical video instead of merely cropping the master.
- Ending with a soft ask: Replace “let us know if you have questions” with one specific next action.
- Skipping the read-aloud pass: Record a rough take and cut any line that feels awkward to say.
A solo marketer can move from brief to final render in one working day if the scope stays narrow. Spend the opening block on the audience, message, and first draft. Use the next block for the A/V layout and screen captures. Record or generate the voice, assemble the visuals, review captions and crops, then export one approved master and its required adaptations.
LunaBloom AI turns scripts, prompts, and images into edited videos with voiceovers, captions, and publishing formats, making it useful for testing an explainer video script before a larger production handoff. Visit LunaBloom AI to turn your finished A/V document into a product demo, tutorial, onboarding video, or social cut.