A great product demo video does more than just record your screen. It crafts a story that solves a customer's real-world problem and shows them exactly how your product is the hero. The process breaks down into a few key stages: planning your story, capturing high-quality footage, editing for impact, and sharing it with the right audience.
Why Product Demos Are Your Secret Sales Weapon
Product demo videos are not just another marketing asset; they are a powerful, revenue-generating tool. A well-crafted demo builds instant trust by showing—not just telling—prospects how your product fixes their specific pain points.
This visual proof is incredibly effective. It can shorten the sales cycle by answering big questions before a prospect even gets on a call. When someone sees the product in action, it gives them the confidence they need to make a purchase decision.
The Shift from Marketing Asset to Sales Driver
The role of the product demo has evolved. They've transformed from simple feature tours into essential tools for closing deals. Today's buyers are self-sufficient; they prefer to do their own research on their own time. A demo video is the perfect tool for this.
The data backs this up. 48% of marketers now create product demo videos as a distinct content category, separate from general explainer videos. And for good reason—a massive 69% of consumers say demos directly influence their buying decision. That means nearly seven out of ten buyers use demos as a final check before committing. You can explore more video marketing statistics on growthpartners.online.
This is why demos have moved from the marketing department's "brand awareness" bucket directly into the center of revenue-driving conversations.
A product demo video is your best salesperson working 24/7. It never has a bad day, delivers the perfect pitch every time, and can speak to thousands of prospects at once.
Bridging the Gap Between Interest and Conversion
An effective demo video doesn’t just show off features; it connects those features to real benefits for the user. It answers the silent questions every potential customer has, like, "How will this make my job easier?" or "How does this solve the one problem that keeps my team from hitting its goals?"
By focusing on the user's journey and their desired outcome, your demo can achieve major business goals:
- Build Immediate Trust: Seeing is believing. A transparent look inside your product cuts through skepticism and proves you can deliver.
- Answer Critical Questions: A good demo anticipates and addresses common objections, removing friction from the buying process.
- Shorten the Sales Cycle: An educated prospect is a warm lead. Demos get them up to speed quickly, allowing your sales team to focus on closing.
Ultimately, knowing how to make product demo videos is about knowing how to communicate value clearly and quickly. With today's tools, including AI-powered platforms, creating these high-impact sales assets has never been more accessible.
Crafting Your Pre-Production Blueprint
A great product demo begins long before you hit 'record'. The pre-production phase is your strategic foundation. This is where thoughtful planning separates a polished, compelling video from one that falls flat.
Success here isn’t about expensive gear; it's about clarity and strategy. Think of your demo as the answer to a specific question. Before writing a single word, be crystal clear on who you're talking to and what pain point you’re solving. This clarity is the heart of your video's message.
Define Your Audience and Their Problem
Who is your ideal viewer? Picture them. Are they a project manager struggling to keep their team aligned? Or a small business owner overwhelmed by administrative tasks? Get specific. This focus dictates your tone, the features you highlight, and the language you use.
Once you know your audience, define their "job story." It’s a simple but powerful framework that connects their problem to your solution: "When I [situation], I want to [motivation], so I can [expected outcome]."
For a B2B SaaS product, it might be: "When managing multiple client projects, I want to see all deadlines in one dashboard, so I can spot bottlenecks before they cause delays." This story becomes the north star for your entire script.
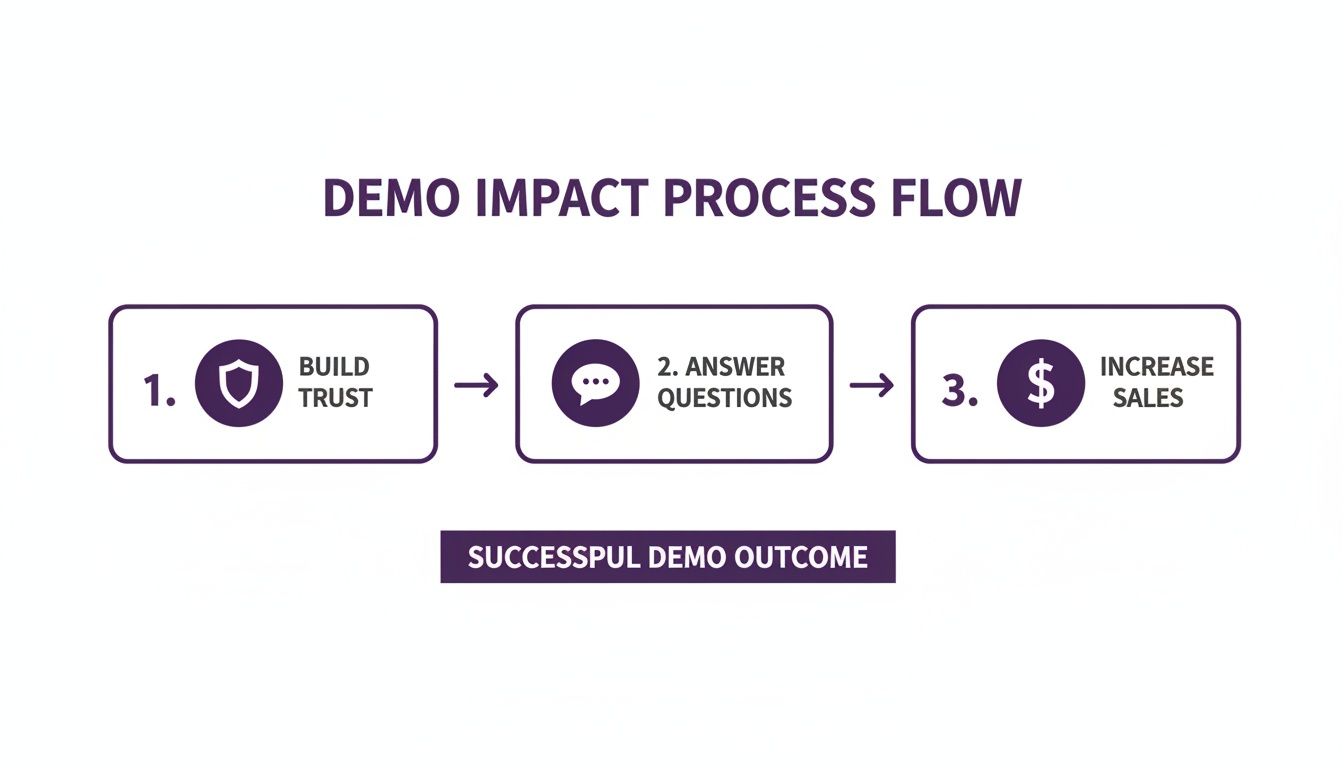
This process shows that a good demo is a journey. It starts by building credibility and ends with a direct impact on your bottom line.
Writing a Script That Tells a Story
A list of features is not a story. The best demo videos follow a simple narrative arc that hooks the viewer by mirroring their own experience.
- The Problem: Start by stating the pain point you identified. Show empathy and prove you understand their struggle to build an instant connection.
- The Solution: Introduce your product as the elegant answer. Showcase the "aha!" feature that directly solves their problem.
- The Benefit: Finally, show the happy ending. Don't just show a feature; show the result—saved time, less stress, or more revenue.
This structure transforms a dry feature tour into a compelling story. Keep it concise. Data shows that demos between 45 and 120 seconds perform best with busy viewers. In fact, 63% of consumers prefer short-form video when learning about a product. Stick to one problem and one clear call-to-action to maintain their attention.
Plan Your Visuals with a Shot List
With your script finalized, it's time to think visually. A shot list is a simple document outlining every visual you need to capture. Think of it as a scene-by-scene checklist for your recording session.
A shot list is your insurance policy against a chaotic recording session. It forces you to think through every visual detail ahead of time, ensuring you capture exactly what you need to tell your story effectively.
Your shot list can be a simple table with columns for the scene number, the corresponding script line, a description of the visual, and any on-screen text. This planning makes the recording process smooth and efficient, saving you from the headache of re-shoots.
As you plan, it's helpful to review general Video Production Best Practices. This groundwork ensures every part of your video is intentional and drives toward your goal.
Recording Your Product Demo Like a Pro
With your blueprint ready, it's time to capture the footage. The goal is to get clean, high-quality audio and video without needing a Hollywood budget. A few smart choices at this stage will make a huge difference in the final product.
Think of it like cooking: the quality of your raw ingredients determines the final dish. Even the best video editor can't salvage shaky footage or muffled audio. Let's simplify the technical side so you can record with confidence.
Nailing the Screen Recording
For most software demos, your screen is the star. Before you start, prepare your digital stage. Close distracting browser tabs, hide desktop icons, and turn off notifications. A random message popping up can ruin a professional take.
Set up a demo account with realistic, clean data. Avoid generic names like "Test User 123" or empty dashboards. Help viewers imagine themselves succeeding with your product by making the environment feel authentic and aspirational.
When you're ready to record, set your resolution to 1920×1080 (1080p). This ensures your video will look crisp and clear on YouTube and other modern screens.
Here are a few pro tips for screen recording:
- Move your cursor slowly and deliberately. Avoid frantic, jerky movements. Every click and drag should feel intentional.
- Use zoom and pan effects. When highlighting a specific button or feature, a subtle zoom guides the viewer's eye and adds a professional touch.
- Record in short bursts. Instead of one long take, record a short clip for each item on your shot list. This makes editing much easier.
User-friendly screen recording tools like Camtasia or Loom are great for this. They bundle recording, simple editing, and sharing into one package, which is ideal for creating product demos efficiently.
Achieving Crystal-Clear Audio
Video quality is important, but audio quality is even more crucial. Viewers might forgive slightly grainy footage, but they will click away instantly if the audio is buzzing, muffled, or echoey. A clear voiceover is essential for building trust.
You don't need a professional sound booth. A quiet room and a decent external microphone will get you 90% of the way there. Your laptop's built-in microphone simply won't suffice.
"Your audience can forgive imperfect visuals, but they will not forgive bad audio. Investing in a decent USB microphone is the single highest-ROI decision you can make for your demo video's quality."
Affordable USB mics like the Blue Yeti or Audio-Technica AT2020 deliver excellent quality for under $150. This small investment pays for itself in perceived professionalism. When recording, speak clearly and at a moderate pace to let your words sink in.
Essential Gear for Your Product Demo
| Equipment Type | Budget-Friendly Option (Under $100) | Mid-Range Option ($100-$300) | Key Feature to Look For |
|---|---|---|---|
| Microphone | Fifine K669B USB Microphone | Blue Yeti or Audio-Technica AT2020 | Cardioid pickup pattern to isolate your voice and reduce background noise. |
| Lighting | Clamp light with a diffusion sheet | Neewer Ring Light Kit or VILTROX LED Panel | Adjustable brightness and color temperature to match your environment. |
| Camera | Your smartphone's camera (recent models) | Logitech C920 HD Pro Webcam | 1080p resolution for sharp, clear video. |
| Screen Recorder | Loom (Free plan) or OBS Studio | Camtasia or Descript | High-resolution recording (at least 1080p) and basic editing features. |
This table shows you can get started with a minimal budget and upgrade later. The most important takeaway is that a dedicated microphone will give you the biggest improvement in quality.
Simple Lighting for On-Camera Segments
If your demo includes on-camera segments, good lighting is what separates an amateur video from a professional one. The goal is to achieve soft, even light on your face without creating harsh shadows.
A three-point lighting setup is the gold standard, but a simpler approach can also yield great results.
- Key Light: Your main light source. Place it off to one side of the camera. A ring light or LED panel works perfectly.
- Fill Light: A softer light placed on the opposite side to "fill in" shadows from the key light. A reflector or a desk lamp with a white sheet can work.
- Backlight (Optional): Placed behind you, this light creates separation from your background and adds depth.
Even a single, well-placed key light against a clean background will dramatically improve your on-camera appearance. Just avoid sitting with a bright window behind you, as this will turn you into a silhouette.
Editing Your Demo for Maximum Impact
This is where the magic happens. You have your raw footage, and now it's time to assemble it into a professional video that people want to watch. Post-production turns a simple screen recording into a compelling story, and you don’t need to be a Hollywood director to achieve great results.
Think of editing as cleaning up a conversation. You're cutting out awkward pauses, "ums" and "ahs," and any other fluff. The goal is a tight, energetic pace that makes your product feel quick and easy to use.
Assembling Your Story and Setting the Pace
First, drop your clips onto the timeline in the order you planned in your shot list. This is your rough cut. Don't worry about perfection yet; just get the core narrative structure in place.
Next, refine the pacing. Go through clip by clip and be ruthless. Trim out dead air, clunky mouse movements, slow-loading screens, or verbal stumbles. These small cuts add up, creating a video that feels confident and respects the viewer's time.
The key is to maintain momentum. Every second of your demo should have a purpose—either showing a critical action or highlighting a benefit. If a clip doesn't advance the story, it likely doesn't belong.
Enhancing with Audio and Sound Design
Audio is the unsung hero of great video. Your voiceover is the guide, but background music and subtle sound effects make your demo feel alive and professional.
Here’s a quick guide to handling audio:
- Background Music: Find an instrumental track that matches your brand's tone. It should sit quietly in the background, adding energy without overpowering your voice.
- Sound Effects (SFX): Small details like a soft "click" for a button press or a "swoosh" for a screen transition make on-screen actions feel more tangible. Use them sparingly.
To get the perfect sound, you may need to know how to extract audio from video. This allows you to clean it up in a dedicated audio editor before adding it back to your project.
Adding Visual Polish with Graphics and Overlays
Text overlays and simple graphics help direct attention and reinforce key points. They add a layer of polish and clarity for the viewer.
Consider adding these elements:
- Text Callouts: Use these to point out important features or highlight a key benefit as it appears on screen. Keep the text brief.
- Lower Thirds: A simple graphic at the bottom of the frame is perfect for introducing a speaker or naming a product feature.
- Branded Elements: Adding your logo in a corner of the screen is an easy way to maintain brand consistency.
Every editing choice should serve the story. A flashy transition might seem cool, but if it distracts from the product’s value, it's doing more harm than good. When in doubt, keep it simple.
It's also worth noting that the world of product demos is evolving. We're seeing a shift from linear videos toward interactive experiences. Benchmarks show the best-performing interactive demos average 12 steps and achieve an 80%+ completion rate. Around 60% use chapters to let users navigate, proving how critical a clear, well-structured flow is. You can see more benchmarks for interactive demos on supademo.com.
Speeding Up Your Workflow with LunaBloom AI
You've mastered the fundamentals of planning, recording, and editing a product demo. But the traditional process can be time-consuming, often requiring expensive gear, specialized skills, and complex scheduling.
This is where AI tools can revolutionize your workflow. Instead of dedicating days or weeks to a single demo, you can create a professional-quality video in a fraction of the time.
Let's walk through how to use the LunaBloom AI platform to turn your script and plan into a polished video without ever touching a camera or microphone.
From Script to Screen in Minutes
Start by getting your script into the platform. LunaBloom AI simplifies this process. Just paste your finished script into the editor, and the AI will immediately generate scenes based on your text.
This script-first approach is a massive efficiency win. It allows you to perfect the story and messaging without getting bogged down by technical production details.
Choosing Your AI Presenter
With your script loaded, you need a presenter. Forget about booking a studio or finding a quiet room to film. You can select your on-screen talent from a library of hyper-realistic AI avatars. They deliver your script with natural expressions and movements, just like a human presenter.
This feature solves several common production headaches:
- No more scheduling conflicts. Your AI presenter is available 24/7.
- Perfect delivery every time. Say goodbye to flubbed lines and endless retakes.
- Maintain brand consistency. Use the same avatar across all your product videos for a recognizable look and feel.
Whether you need a friendly guide for a tutorial or a formal presenter for a corporate demo, you can find an avatar that fits your brand's personality.
Here’s a quick look at the LunaBloom AI dashboard, where you can manage your projects and generate videos.
The interface is clean and intuitive, empowering anyone on your team—not just video professionals—to create great demos.
Generating a Flawless Voiceover
Crisp, clear audio is non-negotiable. But not everyone is comfortable behind a mic, and hiring voice talent is expensive. LunaBloom AI solves this with two powerful options: text-to-speech and voice cloning.
With text-to-speech, you can choose from hundreds of professional AI voices in various languages and accents. Select one that fits your brand, and the platform generates a studio-quality narration from your script.
For a more unique touch, the voice cloning feature lets you create a digital copy of your own voice. After a one-time setup, you can generate any future voiceover in that exact voice, ensuring perfect brand consistency.
Using AI for voiceovers removes the need for expensive microphones or soundproof booths. You get studio-quality audio every time, ready in minutes, not hours.
This technology ensures your demo sounds as professional as it looks, adding a layer of credibility that keeps viewers engaged.
Automating Subtitles and Global Translation
Making your content accessible is smart marketing. Manually transcribing and timing subtitles is tedious, but LunaBloom AI handles it automatically.
The platform generates accurate subtitles for your video instantly. You can easily review and edit them before publishing. This is not just for accessibility; it's also for the 85% of social media users who watch videos with the sound off.
Even better, LunaBloom AI can translate both the voiceover and subtitles into over 50 languages. This turns a single demo into a global marketing asset. Imagine launching a new feature with localized demos ready for audiences in Japan, Germany, and Brazil on the same day.
By automating this manual work, you can focus on strategy instead of tedious post-production tasks. This AI-powered approach saves time and scales your message to reach more customers. To see how it works, learn more about the LunaBloom AI platform.
Answering Your Biggest Product Demo Questions
Once you have the basics down, a few common questions always come up. Answering them can be the difference between a decent demo and one that truly closes deals.
How Long Should My Product Demo Video Be?
The ideal length depends on your audience and where they are in their journey.
For a landing page or social media ad, aim for 60 to 120 seconds. You have a short window to hook viewers at the top of the funnel, showcase the "aha!" moment, and present a call to action.
For prospects already engaged with your sales team or in an email nurture sequence, a longer, more detailed video of 3-5 minutes is appropriate. These viewers are actively seeking a solution and are willing to invest more time.
The golden rule is to respect their time. A tight 90-second video that gets watched to the end is far more valuable than a rambling 5-minute video that people abandon halfway through. Every second must earn its place.
Should I Use a Voiceover or Just Music?
Unless you have a specific artistic reason not to, always use a voiceover.
A human voice does more than explain what's on screen; it builds a connection, adds personality, and provides essential context. It guides the viewer's focus in a way that on-screen text cannot. Music is great for setting a mood, but it should support the narration, not replace it.
If you don't like your own voice or lack the budget for a professional voice actor, AI tools are a perfect solution. Platforms like LunaBloom AI can generate realistic, professional-grade narration from a text script in minutes.
Where Are the Best Places to Share My Demo Video?
A smart distribution strategy is key to getting your video in front of the right audience. Don't just post it in one place and hope for the best.
Here’s a checklist for where your demo should live:
- Your Product Landing Page: Place it front and center, above the fold, to immediately engage and convert visitors.
- YouTube: Optimize the title, description, and tags with relevant keywords. A well-optimized video can rank in Google search results.
- Social Media: Create shorter, snackable clips (15-30 seconds) for platforms like LinkedIn to drive traffic back to your website.
- Email Marketing: Use demos in welcome emails, nurture campaigns, and new feature announcements to showcase value directly.
- Sales Enablement: Equip your sales team with the video link. It's a powerful asset for them to use in outreach to show value instead of just talking about it.
What Are the Biggest Mistakes to Avoid?
Knowing what not to do is half the battle. Many promising demos fail due to a few common, avoidable errors.
The single biggest mistake is focusing on features, not benefits. No one cares about your new button; they care about how that button solves their problem. Always frame your demo around the user's pain point and your solution.
Other common mistakes include:
- Poor Audio Quality: Echoey, muffled, or buzzing audio will cause viewers to leave immediately.
- A Messy Screen: Use a clean demo account. Avoid showing a cluttered desktop, personal browser tabs, or random notifications.
- Moving Too Fast: Slow down. Use deliberate, smooth cursor movements. Frantic clicking is hard to follow and looks unprofessional.
- No Clear Call-to-Action (CTA): Tell the viewer what to do next. End with a clear, direct step like "Start a Free Trial," "Book a Call," or "Learn More."
Ready to skip the cameras and microphones to create a professional demo in minutes? With LunaBloom AI, you can turn your script into a polished video with AI avatars, voice cloning, and automatic translations.